# PixelLab — Full documentation for LLMs
> PixelLab is an AI pixel art generator for game developers. It creates sprite sheets, animated characters, rotating sprites, tilesets, and full game maps — usable in-browser, through a REST API, via plugins for the Aseprite and Pixelorama editors, or via an MCP server that lets AI coding assistants (Claude, Cursor, ChatGPT, Claude Code, Windsurf) generate pixel art programmatically.
PixelLab includes two dedicated creator surfaces alongside the generation tools: a **character creator** that generates a character from text, shows it from multiple perspectives with 4 or 8 rotational directions, and lets users easily add animations (walk, run, idle, attack, etc.) that play correctly in every direction; and a **draw-to-create map editor** where users paint their own top-down maps tile by tile with AI-generated Wang tilesets available on demand.
This file inlines the full content of every documentation page so an LLM can answer questions about PixelLab without making additional fetches. For the compact index, see https://www.pixellab.ai/llms.txt. For the API reference specifically, see https://api.pixellab.ai/v2/llms.txt.
**Key resources:**
- Homepage: https://www.pixellab.ai/
- Web editor: https://www.pixellab.ai/create
- Character creator (4/8 rotations + animations): https://www.pixellab.ai/create-character
- Map editor (draw-to-create): https://www.pixellab.ai/map-editor
- Tileset generator: https://www.pixellab.ai/create-tileset
- MCP server info: https://www.pixellab.ai/mcp
- REST API info: https://www.pixellab.ai/pixellab-api
- API Swagger UI: https://api.pixellab.ai/v2/docs
- API OpenAPI schema: https://api.pixellab.ai/v2/openapi.json
- API llms.txt (condensed API reference): https://api.pixellab.ai/v2/llms.txt
- Python SDK: https://github.com/pixellab-code/pixellab-python
- JavaScript SDK: https://github.com/pixellab-code/pixellab-js
- MCP server repo: https://github.com/pixellab-code/pixellab-mcp
- Aseprite plugin repo: https://github.com/pixellab-code/aseprite-pixellab-plugin
- Pixelorama plugin repo: https://github.com/pixellab-code/pixelorama-pixellab
---
# Introduction
URL: https://www.pixellab.ai/docs/index
Welcome to the PixelLab Documentation. PixelLab offers multiple ways to generate and edit pixel art, including a simple web creator, an in-browser editor (PixelLab Pixelorama), an Aseprite extension, and API access. It is primarily aimed at artists and game developers.
While this documentation strives to be a comprehensive resource, guiding you through PixelLab's features, it is, much like our tool, a continuous work in progress. As our team develops new tools and enhances existing ones, there might be times when the documentation plays a bit of catch-up.
To get started, you can learn about the **[different ways to use PixelLab](/docs/ways-to-use-pixellab)** or explore some tool fundamentals with our **[getting started guide](/docs/getting-started)**.
We appreciate your patience and feedback as we work to refine both our tools and this reference guide. Please reach out on [Discord](https://discord.gg/pBeyTBF8T7) with any suggestions or inquiries.
---
# Ways to Use PixelLab
URL: https://www.pixellab.ai/docs/ways-to-use-pixellab
PixelLab offers several ways to access its image generation and editing tools, catering to different workflows and preferences. Whether you're experimenting on your phone, building a game with AI assistance, or integrating into your pro workflow, there's an option that fits.
## Overview
1. **Simple Web Creator** — Quick, lightweight tool for fast generations. Works on desktop and mobile.
2. **Characters (NEW)** — Instant character creator for 4/8 directional animated sprites.
3. **PixelLab Pixelorama (In-browser Editor)** — Full-featured browser-based editor using the open-source Pixelorama.
4. **Aseprite Extension** — Bring PixelLab tools directly into your local Aseprite environment.
5. **Vibe Coding (AI Agent Toolkit)** — Give your AI coding assistant pixel art superpowers via MCP.
6. **API Access** — Use PixelLab's backend tools in your own app or pipeline.
7. **Videos** — demos and tutorials
---
## 1. Simple Web Creator
Our Simple Web Creator is the fastest way to generate images. Runs entirely in your browser and supports mobile devices.
- **Access:** Visit the [Create Page](/create).
- **Features:** Uses our "PixFlux" (for medium to extra-large images) and "BitForge" (for small to medium images) models.
- **Best for:** Quick experiments, base image generation, or working on a mobile device.
- **Limitations:** Streamlined interface with fewer features than the editor integrations.
---
## 2. Characters
Create game-ready characters with 4 or 8 directional views and custom animations — all from simple text descriptions.
- **Access:** Visit the [Characters Page](/create-character).
- **Features:**
- Generate characters in 4 or 8 directions from text prompts
- Add walk, run, idle, and other animations with one click
- Export as sprite sheets or individual frames
- Built-in animation preview
- **Best for:** Game developers needing quick character assets, RPG makers, and anyone creating directional sprites.
- **Platform:** Works on desktop and mobile browsers.
---
## 3. PixelLab Pixelorama (In-browser Editor)
Pixelorama is a free, open-source pixel art editor. We've integrated PixelLab directly into it for a full editing + AI generation experience — all in your browser.
- **Access:** Open the [In-browser Editor](/editor).
- **Features:** Full Pixelorama toolset + PixelLab's AI generation tools.
- **Platform:** Desktop browsers only.
- **Best for:** Users wanting an advanced browser-based editor with full creation + generation features.
- **Limitations:** No support for mobile browsers.
---
## 4. Aseprite Extension
Use PixelLab inside Aseprite, the professional-grade pixel art tool.
- **Access:**
- Download from your [Account Page](/account#tools).
- Follow the [Installation Guide](/docs/installation).
- **Features:** Seamless AI-powered generation inside your Aseprite workflow.
- **Requirements:** Aseprite v1.3+. Trial version does not support extensions.
- **Best for:** Existing Aseprite users who want native integration.
- **Limitations:** Requires Aseprite and local installation.
---
## 5. Vibe Coding (AI Agent Toolkit)
Enable AI-powered game development by giving your coding assistant direct access to PixelLab's generation tools through the Model Context Protocol (MCP).
- **Access:** Visit the [MCP Integration Page](/mcp) for setup instructions.
- **Features:**
- Generate characters, animations, tilesets, and isometric tiles from your IDE
- Works with Claude Code, Cursor, VS Code, and other MCP-compatible AI assistants
- Godot-specific tooling for headless game development
- Complete asset-to-code workflow automation
- **Best for:** Developers using AI assistants, rapid game prototyping, "vibe coding" workflows.
- **Requirements:** MCP-compatible AI assistant and active subscription.
---
## 6. API Access
Use PixelLab in your own software, games, or pipelines through our API.
- **Access:**
- Directly via the [API Docs](https://api.pixellab.ai/v1/docs).
- For Python users, we offer a [Python SDK](https://github.com/pixellab-code/pixellab-python) to simplify integration.
- **Features:** Programmatic access to image generation (PixFlux, BitForge), animation (skeleton, text), inpainting, rotation, and more
- **Best for:** Automation, dynamic in-game asset creation, and custom tool development.
- **Limitations:** Requires setup and coding knowledge.
---
## 7. Videos
Check out our [YouTube channel](https://www.youtube.com/@PixelLab_AI) for tutorials, demos, and behind-the-scenes looks at how to use PixelLab in various ways.
---
# Introduction to Pixelorama
URL: https://www.pixellab.ai/docs/introduction-pixelorama
## About Pixelorama
Pixelorama is a free, open-source pixel art editor. We've integrated PixelLab directly into it for a full editing + AI generation experience — all in your browser.
- **Access:** Open the [In-browser Editor](/editor).
- **Features:** Full Pixelorama toolset + PixelLab's AI generation tools.
- **Platform:** Desktop browsers only.
- **Best for:** Users wanting an advanced browser-based editor with full creation + generation features.
- **Limitations:** No support for mobile browsers.
### Documentation
For detailed information about Pixelorama's features and tools, visit the [official Pixelorama documentation](https://www.oramainteractive.com/Pixelorama-Docs/).
## PixelLab tutorials with Pixelorama
Tutorials using Aseprite are still good to watch when using Pixelorama as the concepts are the same but the UI layout might be different.
---
# Init images and inpainting
URL: https://www.pixellab.ai/docs/getting-started
Welcome to the PixelLab documentation! This guide will help you get started with init images and inpainting using the [Create S-M image tool](/docs/tools/style_old).
## The Create S-M image tool
Open Aseprite or Pixelorama and select `Create S-M image` from the menu by first clicking `Create image >`.
_PixelLab opens automatically when you start Aseprite but if it is closed then you can open it again through the menus:_
```
Edit > PixelLab > Open plugin
```
or by pressing,
ctrl + space + p.
## Configuration
It's usually a good idea to start from an [_init image_](/docs/options/init-image). The init image is optional but it is one of the best ways to improve the results you're getting from PixelLab. You can start from a very rough sketch like this:
We'll use the following settings for the generation:
- `Description`: Human mage
- `Use init image`: Yes
Everything else was left as the defaults you see in the image. Let's click `Generate`!
## The first result
The model gave the following output. If you're following along you will get another result since the generation is random.
The sprite is pretty good but there are definitely some parts that can be improved, it's not exactly clear what he's holding in his hand and the head looks a bit weird. Let's try to use the [inpaint tool](/docs/tools/inpaint) to fix these issues.
## Inpainting
Click `Back` and then `Cancel`to return to the main menu and then, select `Inpaint`.
This will create a new layer on top of the generated image that we can use to paint black over the parts that we want to change. The model can only modify the black parts, anything else will be left unchanged.
Let's try to fix the head first, this is how the image looks after painting over the head in the inpainting layer,
Notice in the settings image that we now use our generated image as init image. We'll lower the `Init image strength` slightly which gives the model more freedom to change the image. We'll set the output method to `Modify current layer` so that the changes are applied directly to the image. Then we'll click `Generate` again.
This time, the output looks like this:
## Init image and inpainting
Ok, now that we're satisfied with the head let's try to fix the hand as well. This time let's combine both _inpainting_ and _init image_.
We'll modify the image slightly and then paint over the area around the hand in the inpainting layer. After drawing a rough sketch of a fireball hovering above the character's hand and then inpainting the area it should look something like this:
## The final result
After clicking _Generate_ again we get the following output:
You can continue iterating like this as many times as you want until you are happy with the result.
---
# Aseprite Extension Installation Instructions
URL: https://www.pixellab.ai/docs/installation
## Get Aseprite
Make sure you have the latest Aseprite (minimum version is v1.3.7). The trial version does not allow plugins.
Aseprite is open source, but it is not allowed to be redistributed. There are multiple ways to get it. You can, for example:
- [Buy it to support the developers](https://www.aseprite.org/download/)
- [Use a helper to build it locally (Windows)](https://github.com/Perndoe/Aseductor)
- [Build it with Docker (Linux)](https://github.com/pixellab-code/docker-aseprite-linux)
## Download the extension
After subscribing or signing up for the free trial, there will be a button to download the PixelLab extension from your [account page](/account).
## Install the extension
You should be able to double click the downloaded file to install it. If you can't, you can also install it manually.
First, open Aseprite. From the menu bar, go to,
```
Edit > Preferences
```
Choose _extensions_ in the list to the left, then click on "Add Extension" and locate the file that you downloaded in [the first step](#download-the-extension).
## Allow file and internet access
After finishing the steps above restart Aseprite and you should be prompted to give the plugin access to a file called `package.json` and internet access via websockets.
The plugin requires access to these and if you want the auto-update function to work you also need to give the plugin "full trust" so that it can overwrite itself in the future.
## Finish the installation
You should now see a new window, the PixelLab menu. If you don't see the window or if you accidentally closed it, you can open it from the menu bar,
```
Edit > PixelLab > Open plugin
```
or by pressing,
ctrl + space + p.
---
# Frequently asked questions
URL: https://www.pixellab.ai/docs/faq
## Free trial
The code is at the end of the video explaining how the free trial tools work. You can find it [here](https://www.youtube.com/watch?v=Tbmfh4pBPeo).
Since the free trial includes only a limited number of generations, only the
tools that are the easiest to use are included.
## General
See instructions in the [installation](/docs/installation#get-aseprite) section.
No, we do not use any user inputs or generated content to train our models.
Yes, it works on Windows, Mac, and Linux.
No, the models run on cloud GPUs so you don't need a strong graphics card yourself.
No. We don't want to incentivize using the tools as little as possible. The
generation limits are not enforced unless it becomes a problem.
Yes, you are allowed to use AI assets in your games.
"[...] we are updating the Content Survey that developers fill out when submitting to Steam. The survey now includes a new AI disclosure section, where you'll need to describe how you are using AI in the development and execution of your game. It separates AI usage in games into two broad categories:
> Pre-Generated: Any kind of content (art/code/sound/etc) created with the help of AI tools during development. Under the Steam Distribution Agreement, you promise Valve that your game will not include illegal or infringing content, and that your game will be consistent with your marketing materials. In our pre-release review, we will evaluate the output of AI-generated content in your game the same way we evaluate all non-AI content - including a check that your game meets those promises.
> Live-Generated: Any kind of content created with the help of AI tools while the game is running. In addition to following the same rules as Pre-Generated AI content, this comes with an additional requirement: in the Content Survey, you'll need to tell us what kind of guardrails you're putting on your AI to ensure it's not generating illegal content."
[Link to full article](https://steamcommunity.com/groups/steamworks/announcements/detail/3862463747997849619)
Yes, we only ask that you do not train new models with the images.
A lot of people have asked for a one-time payment instead and, while this is something we are open to in the future, we think
a subscription is the most consumer-friendly method for PixelLab given that:
1. It doesn't make sense to pay a large cost upfront for a technology that may be deprecated in a few months.
2. We are paying for cloud GPUs each month so we would need to make everything run locally for this to make sense. We would need to spend a lot of time making everything work on each customer's computer
instead of spending time on making better tools. Several of the tools require good GPUs and some customers would not be able to use them or we would need to spend even more time trying to optimize memory and performance.
3. Paying monthly is low risk for the customer, you can stop using the product any time you want if you don't like it.
4. A monthly payment is a good incentive for us to keep making better and better tools for you.
That being said, we know a lot of people are allergic to subscriptions and running locally may still happen at some point when we have the bandwidth available to make it happen.
Yes, you will only pay for the remaining days.
This seems to happen for some users and can be because the websocket requests get blocked or the connection is lossy. To debug what the issue might be you can:
- Try another connection (e.g. via your phone)
- Use a VPN (there are some free alternatives you can use just to test)
- Test with another computer
Sadly we cannot do much to improve handling of lossy connections because Aseprite has very limited networking functionality.
You can downsize your photo and then use it as an init image with, for
example, "Create image (style, old)" or "Generate large image".
## The tools
If you're using the Aseprite extension, you can find the settings and output
of your previous generations. Toggle "advanced options" to show the "Load
previous settings" option.
---
# Using the Create Map tool
URL: https://www.pixellab.ai/docs/guides/map-tiles
In this guide, we'll generate a scene inside a cave, with stairs leading up to a treasure chest. We'll constrain ourselves to a 128x128 pixel image. Since the model is trained on 16x16 pixel tiles, this will give us an area that has a width and height of 8 by 8 tiles.
## Setting up the scene
First, let's open the [Create Map tool](/docs/tools/map-tiles). It's always a good idea to provide an [init image](/docs/options/init-image#init-image) together with the [text description](/docs/options/guidance#description) of what we want our selected area to look like. We'll start with this:
## Tell the model what to generate
We'll use the setting [_paint in selection_](/docs/options/general#paint-in-selection) and select a 4 by 4 area of tiles using the selection tool.
The model uses [inpainting](/docs/tools/inpaint). Since this is the first part of the image, we want the model to generate everything inside the selection. To achieve this, we'll fill the inpaint layer with black inside the selection.
Your canvas should now look something like this.
We'll use _"stairs in a cave"_ as the [description](/docs/options/guidance#description) and press generate.
The 4 by 4 tile selection tells the model what part of the map to generate.
The inpaint layer tells the model where, inside the selection, it can modify the image.
## The first generation
After a few retries, the model produced this result, which seems like a decent starting point.
The first result does not have to be perfect, as many things can be fixed later with inpainting, but it's good to have something that is close to the style we're looking for.
Because of how the model has been trained, to produce the best results, the _description_ should describe what's in the **middle** of the selected area.
## Expanding the image
We'll now expand our generated image. Let's start by expanding it to the right.
1. Select an area that partly overlaps with what we have already generated.
2. Draw a rough sketch inside the selection.
3. Draw black in the inpaint layer where we want to generate.
The model can only see what is **inside the selection** when generating. If we want to have a consistent style and smooth transitions between tiles, it is important that we **don't inpaint the whole selection area**, as that leaves no reference for the model to use.
## Generating the new area
Next, we'll update the [description](/docs/options/guidance#description), adjust the [init image strength](/docs/options/init-image#init-image-strength), and then generate the new area. You can see the values used in the picture.
## Drawing the rest of the map
We can repeat steps 4 and 5 to fill out the rest of the tiles. Below is an animation of the process.
## Final touches
After the entire map has been generated, we can use [inpainting](/docs/tools/inpaint) to add detail and fix anything we don't like. The workflow is the same as before. For our image, the following changes were made.
## The final result
---
# Rotating a character
URL: https://www.pixellab.ai/docs/guides/rotating-a-character
This guide will show you the basics of rotating a character using the [Rotate tool](/docs/tools/rotate).
## The rotate tool
The [Rotate tool](/docs/tools/rotate) has been trained with the intention of altering the direction a character or object is facing. There are generally two options for going about rotating a character:
1. Use an image where the character is facing the camera (south, south-east, south-west, etc.) and generate the other 7 directions with that as the reference.
2. Update the reference image after each generation so that the rotation is always 45 degrees from the previous direction.
The second method has the advantage that the model is usually better at making small rotations; however, any errors will accumulate after each generation.
## View and direction
Here is a diagram showing the different views and directions:
The above images were generated by the model and should therefore give an idea of how the model perceives the different views and directions.
## Changing direction
Let's start with this image of a pirate (generated using the workflow described in the [Getting Started guide](/docs/getting-started)).
First, we'll select the [Rotate tool](/docs/tools/rotate). If we reference the above chart, we can see that the `From direction` is `south` and the `From view` is `Sidescroller`. Let's set `To direction` to `south-east`, `To view` to `Sidescroller`, and then go ahead and click **Generate**.
## The result
Here is the generated image of the pirate facing south-east:
Now we can choose from the 2 methods described above to generate the remaining directions. Below is the result of generating all the directions from the same starting image.
It's not perfect, as we can see it especially struggles with the hat, but it will save a lot of time compared to hand-drawing each direction from scratch. There are several options to make fixes to a generated direction:
- The easiest option is, of course, regenerating everything from scratch again. However, the model might make the same mistake again (for example, with the hat above).
- Fixing the parts where it failed using the [inpaint tool](/docs/tools/inpaint).
- Using the generated direction with slight manual fixes as an init image for a new generation.
- If the character is symmetric, we can use the mirrored direction, i.e., if the `south-east` direction looks bad but the `south-west` direction looks good, we can flip the good `south-west` direction horizontally to get a new `south-east` direction.
## Bonus: Changing the camera view
Sometimes it can be useful to change the camera perspective that a character is shown from. This is not something the model has been trained to do, but sometimes it works quite well. To do this, we would keep the `From/To direction` constant but change the `From/To view`. Here is our character going from `Sidescroller` to `Low top-down`, to `High top-down`:
We could take it even further by "lying" to the model and using `From view` =
`Sidescroller` on the generated `High top-down` image, and then regenerate
with `To view` = `Low top-down`.
---
# Animate with skeleton
URL: https://www.pixellab.ai/docs/tools/animate-with-skeleton
The skeleton animation tool is used for better control over animating your character. You can use inpainting and init images to better control the output of the model.
The skeleton you create can be saved as images/aseprite files and reused for your other characters. Just make sure that they are in the "Pose - PixelLab" layer.
Accepted canvas sizes are 256x256, 128x128, 64x64, 32x32, and 16x16. It is recommended to have a canvas size that best fits the character/object you wish to animate.
## 1. Skeleton setup
We currently have two recommended ways of quickly creating skeletons, "Template skeleton" and "Animation to animation".
You can modify these manually or create skeleton animations entirely by hand using edit skeleton.
### 1.1. Template skeleton
1. Start of by selecting the character you want to animate as reference image. This is done by going to the frame where you character is and clicking "Set reference". (Set reference will automatically "estimate skeleton" and give you a skeleton for your character)
2. Edit the skeleton (shortcut -> ctrl + space + e) if needed, estimate skeleton isn't perfect and might require some touch ups.
3. Change template view and direction so it matches what you want.
4. Select the animation template you want to use.
5. Use the settings and edits to the reference skeleton to make adjustments so the template skeleton is as similar to your character as possible.
6. Once you think it's good enough insert template.
7. Go through the frames and edit skeleton where it is required.
Tip! If it's fine that the characters head doesn't move much in the animation we recommend setting fixed head -> "always" (setting found in advanced options).
This will help ensure that your characters face looks the same throughout the animation as it will copy over the head of reference skeleton to the template.
### 1.2. Animation to animation
1. Find an animation you like and place them in the same project as your reference image.
2. Set your character you want to animate as reference. This is done by going to the frame where you character is and clicking "Set reference".
(Set reference will automatically "estimate skeleton" and give you a skeleton for your character)
3. Select the frames that contains the animation and click "Set animation". This will automatically add skeletons to the frames selected. (In the example below we have selected frames 2 -> 5)
4. Check the animation skeletons for any issues and fix them using "Edit skeleton".
5. Use the settings to change the size / position so it matches your character as best as possible. You can click show reference, to have an easier time comparing the animation to the reference skeleton.
6. Once it looks good, click "rescale", check all of the frames and "edit skeleton" if you see any issues.
Tip 1! If it's fine that the characters head doesn't move much in the animation
we recommend setting fixed head -> "always" (setting found in advanced options). This will help ensure that your characters
face looks the same throughout the animation as it will copy over the head of
reference skeleton to the template.
Tip 2! Animation to animation can also be used to rescale any skeletons, so if you wish to for example rescale your template skeleton you can do that as well.
## 2. Generate
### 2.1. Freeze 1 -> Generate 2 frames
Once you have the skeletons for the animation it is time to generate!
1. For the first generation it is recommended to use "Freeze 1 -> Generate 2 frames".
2. Change the direction and view so it matches the animation you are creating.
3. Set your character as reference.
4. Position yourself on the reference frame so that the model has a good frozen frame. (see image below)
5. Click "Generate"
#### 2.1.1. Result from first generation
Animation we copied (made by user JosephT) and the result
### 2.2. Custom
Lets say we now want to fix the arm in the first generated frame. We can use Generation setup "Custom" which allows us to pick which frames we want to be frozen and
which we want to edit using inpainting (You can use inpainting in the other settings as well). We decide to use custom because we want to freeze frame 1, 3 and 4 because we like how they look.
(See settings below)
Only the arm of the character in frame two will be
edited because it has been inpainted.
#### 2.2.1. Result from second generation
### 2.3. Freeze 2 -> Generate 1 frame
Works like generation setup "Freeze 1 -> Generate 2 frames" but instead of having one frame for guidance we now have 2.
Best to use when you have existing animation frames and you want to add more because the model will produce better results with more information.
In the following example we improvw the last frame using the previous three.
#### 2.3.1. Result from third generation
## 3. Recommended workflow
1. Setup skeleton using previous mentioned methods
2. Set your character as a reference image by clicking on "Set reference image".
3. Set the view and direction which fits your character.
4. Position yourself so you have good frozen frames for the model to use as guidance.
5. Generate
6. Do very rough manual fixes / edit skeleton.
7. Generate new frames using the roughly fixed frames as init images. Use inpainting to decide which parts that you want to be changed.
8. Repeat from step 6 and gradually increase the init image strength as you get closer to what you want.
## 4. Tutorial Videos
## 5. Options
- [Guidance weight](/docs/options/guidance#guidance-weight) of the original image
### 5.1. Character
- [Camera view](/docs/options/guidance#camera-view)
- [Guidance weight](/docs/options/guidance#guidance-weight)
### 5.2. Color
- [Target Palette](/docs/options/color#target-palette)
### 5.3. Init image
- [Init image](/docs/options/init-image#init-image)
### 5.4. General
- [Seed](/docs/options/general#seed)
## 6. Limitations
- The canvas size must be one of the following: 256x256, 128x128, 64x64, 32x32, or 16x16.
- This feature requires at least Tier 1.
---
# Animate with text (New)
URL: https://www.pixellab.ai/docs/tools/animate-with-text-new
The new Animate with Text tool generates animation frames from a single reference image using a text action description. It produces smoother and more natural animations compared to the previous version.
## How It Works
1. Upload a reference image (your character or object)
2. Enter an action description (e.g., "walking", "jumping", "attacking")
3. Choose the number of frames (4-16, must be even)
4. Generate
The tool animates your reference image based on the action you describe, keeping the first frame identical to your input.
## Key Differences from Previous Version
- **Free for all users** — no subscription required
- **Flexible frame count** — choose 4 to 16 frames (must be even)
- **Dynamic pricing** — cost scales with image size and frame count
- **Faster generation** — uses a new animation model
- **First frame preserved** — your input image is always kept as frame 1
## Cost
Cost depends on image size and frame count. Common examples:
| Size | 4 frames | 8 frames | 16 frames |
|------|----------|----------|-----------|
| 64x64 | 1 gen | 2 gens | 3 gens |
| 96x96 | 2 gens | 3 gens | 5 gens |
| 128x128 | 3 gens | 5 gens | 9 gens |
| 256x256 | 9 gens | — | — |
Larger images support fewer frames due to a total pixel budget. The exact cost is shown in the UI before generating.
## Options
- **Reference Image** (required): Your character or object sprite to animate
- **Animation Action** (required): What animation to create (e.g., "walk", "run", "jump", "attack", "idle")
- **Frame Count**: Number of animation frames, 4-16 (must be even). Maximum depends on image size.
- **Remove Background**: Generate with transparent background
- [Seed](/docs/options/general#seed)
## Limitations
- Maximum reference image size is 256x256 pixels
- Frame count must be even (4, 6, 8, 10, 12, 14, or 16)
- Total pixel budget: width × height × frames cannot exceed 524,288
- For example, a 256x256 image can only have 4-8 frames
- A 64x64 image can have up to 16 frames
- Available in Pixelorama, Aseprite, and Creator
---
# Animate with text (Pro)
URL: https://www.pixellab.ai/docs/tools/animate-with-text-pro
The Animate with Text tool generates animation frames from a single reference image using an action description.
## How It Works
1. Set your character as the reference image using the "Set" button
2. Enter an action description (e.g., "walk", "jump", "attack")
3. Optionally set the view and direction
4. Generate
The tool automatically generates multiple animation frames based on the action you describe.
## Frame Output by Reference Size
- **32x32** or **64x64** → 16 frames (4×4 grid) — 10 generations
- **65-128px** → 4 frames (2×2 grid) — 10 generations
- **129-170px** → 4 frames (2×2 grid) — 15 generations
- **171-256px** → 4 frames (2×2 grid) — 25 generations
## Options
- **Reference Image**: Your character sprite
- **Action**: What animation to create (e.g., "walk", "run", "jump", "attack", "idle")
- **View**: Camera perspective (low top-down, high top-down, or sidescroller)
- **Direction**: Which way the character faces (south, south-east, east, etc.)
- **No Background**: Generate with transparent background
- [Seed](/docs/options/general#seed)
## Limitations
- Maximum reference image size is 256x256 pixels
- Requires Tier 1 subscription
- Available in Pixelorama, Aseprite, and Creator
---
# Animation to animation
URL: https://www.pixellab.ai/docs/tools/animation-to-animation
The **Animation to animation** tool allows you to generate animation frames based on your descriptions and preferences. This powerful tool creates consistent character animations by generating multiple frames that maintain character appearance and style throughout the sequence.
## 1. Opening the Animation Window
To get started with the "Animation to animation" feature, the first thing you'll do is open the Animation to Animation window.
## 2. Setting Up Your Animation
Inside the window, you'll find several settings to configure your animation.
### 2.1. Number of Images
At the top, you'll see a slider labeled **Number of images**. Use this to set how many frames you want the tool to generate for your animation sequence in one go. Keep in mind that the maximum number of frames you can generate at once might depend on your canvas size.
It's recommended to start with as few frames as possible (typically 2) to cycle through good references faster and establish a consistent character appearance.
### 2.2. Animation Reference
Below that, you'll see the **Animation reference** section. This is where you can choose to use an existing reference image or an init image. This is handy if you have a specific look or character you want to start with. We'll touch on using a generated frame as a reference later to help keep things consistent.
### 2.3. Description
Next is the **Description** field. Type in a description of the character or the art style you want to animate. For example, "man with a straw hat and blue overalls" as shown in the image.
### 2.4. Action Description
In the **Action description** field, briefly describe the movement or action you want the character to perform, like "walk".
### 2.5. Camera View
Select the perspective or camera view for your animation from the dropdown menu.
### 2.6. Direction
Choose the direction of the action if applicable.
### 2.7. Appearance Settings
You can adjust the appearance of your animation here by picking options for outline, shading, and details. Feel free to experiment with these settings like "selective outline", "basic shading", and "medium detail" to see what fits your style best.
### 2.8. Advanced Options
Under the **Advanced Options**, you can fine-tune how the AI generates the animation:
#### 2.8.1. AI Freedom / Robust
- **AI freedom**: Influences how much creative latitude the AI takes during generation.
- **AI freedom (robust)**: Similar to the above, but less strict when following the template. This may offer more robust control over AI variability.
- **Guidance Weight**: This controls how closely the AI sticks to your description. Adjusting these helps balance adherence to your input versus allowing the AI to add its own variations.
## 3. Generating Your Animation
Once you've set up all your preferences:
1. Click the **Generate** button at the bottom of the window
2. Start with as few frames as possible to cycle through good references faster. (least amount would be **2**)
3. The tool will process your settings and generate the specified number of frames based on your input
## 4. Maintaining Consistency with a Reference
When using Animation to Animation with no reference, in a perfect world after your first generation, you might get a frame you really like. To help ensure subsequent sets of frames stay consistent with that look:
1. **Take one of the generated frames** that you like
2. **Go back to the Animation reference section**
3. **Set that preferred frame as your reference image** by checking the "Use reference image" box and "setting" your frame image there as a reference image
4. This helps the tool keep the character and style consistent as you generate more frames
**Repeat the generation process** as needed, using the reference image to build out your full animation sequence
While the tool gets you most of the way there, expect that you might need to do some manual cleanup on the frames afterward.
## 5. Workflow Tips
### 5.1. Starting Your Animation
1. **Begin with minimal frames**: Start with 2 frames to establish your character
2. **Use clear descriptions**: Be specific about character appearance and actions
3. **Experiment with settings**: Try different appearance options to find your style
### 5.2. Building Your Sequence
1. **Find your reference frame**: After the first generation, identify the frame you like best
2. **Set it as reference**: Use that frame as your reference image for consistency
3. **Generate more frames**: Continue generating with the reference to build your sequence
4. **Iterate and refine**: Make adjustments to descriptions and settings as needed
### 5.3. Final Polish
1. **Review all frames**: Check for consistency across your animation
2. **Manual adjustments**: Use editing tools to fix any issues
3. **Test the animation**: Play through your sequence to ensure smooth motion
## 6. Best Practices
1. **Start simple**: Begin with basic actions like "walk" or "idle"
2. **Be descriptive**: Provide detailed character descriptions for better results
3. **Use references**: Always set a reference image after finding a frame you like
4. **Iterate gradually**: Make small changes and test frequently
5. **Plan your sequence**: Think about the full animation before starting
## 7. Common Use Cases
- **Character walking animations**: Create smooth walking cycles
- **Idle animations**: Add subtle movement to static characters
- **Action sequences**: Generate attack, jump, or other action animations
- **Character variations**: Create different versions of the same character
## 8. Related Tools
- **[Animation with Text](/docs/tools/animation)**: Alternative animation method using text prompts
- **[Skeleton Animation](/docs/tools/skeleton-animation)**: Advanced animation with skeleton-based control
- **[Interpolation](/docs/tools/interpolation)**: Add intermediate frames between keyframes
- **[Rotate Tool](/docs/tools/rotate)**: Create character rotations for multi-directional animations
## 9. Result Preview
## 10. Tutorial Videos
## 11. Limitations
- Requires at least **Tier 2** subscription
- Canvas size must be one of:128x128, 64x64, 32x32, or 16x16
- Maximum number of frames per generation depends on canvas size
- Quality depends on the clarity of your descriptions and original Animation quality
- May require manual cleanup for perfect results
---
# Animation with text
URL: https://www.pixellab.ai/docs/tools/animation
We recommend using the [Animate with skeleton](/docs/tools/skeleton-animation) tool for characters.
The Animation with text tool allows you to generate 4 animation frames that depict various types of animations for a character.
It allows you to condition the creation on existing character images:
- Condition on a single idle character and generate 3 animation frames.
- Condition on 3 animation frames and create a single new frame that better matches the flow of the animation.
- Condition on images in the first and last positions and generate 2 frames between that interpolate the animation.
Recommended workflow:
1. Use an existing reference image where the character is looking in the same direction as you want it to look during the animation.
2. (Optional) Modify an existing animation as a rough init image. Try to color match approximately with the reference image.
3. Select a simple action prompt like "run" or "jump".
4. Generate 3 new frames from the reference image a few times. Pick out the frames you like and reorder them appropriately to create a convincing animation.
5. Do rough manual fixes to the frames.
6. Generate new frames using the roughly fixed frames as init images. Use inpainting to freeze the parts that you do not want to be changed.
7. Repeat from step 4 and gradually increase the init image strength as you get closer to what you want.
This is demonstrated here in a tutorial showing how to create a running animation using a template:
Tutorial on how to create a walking animation without a template:
## Attack animations
Recommended workflow for attack animations:
Generating attack animations works similarly to generating movement with the exception that if you want to create large special effects,
it is recommended to move your character to the side of the canvas so the model has more space to create special effects.
Here you can find a demo of generating attack animations:
## Extra demos
Note that these demo videos are from an earlier version of the animation tool that was weaker when it did not support inpainting.
## Options
- [Number of reference images](/docs/options/general)
- [Guidance weight](/docs/options/guidance#guidance-weight) of the original image.
### Character
- [Character description](/docs/options/character#character-description)
- [Negative description](/docs/options/guidance#negative-description)
- [Camera view](/docs/options/guidance#camera-view)
- [Direction](/docs/options/character#view-and-direction)
### Action
- [Action description](/docs/options/animation#action-description)
- [Guidance weight](/docs/options/guidance#guidance-weight) for [Action description](/docs/options/animation#action-description)
### Color
- [Target Palette](/docs/options/color#target-palette)
### Init image
- [Init image](/docs/options/init-image#init-image)
### General
- [Seed](/docs/options/general#seed)
## Limitations
- The canvas size must be exactly 64x64.
- This feature requires at least Tier 1.
---
# Create images from style references (Pro)
URL: https://www.pixellab.ai/docs/tools/consistent-style
The Create Images from Style References tool generates multiple new images that match the visual style of your reference images. Perfect for creating characters, items, and objects that fit together in your game.
## How It Works
1. Add one or more style reference images using the "Add style image" button
2. Enter a description of what you want to generate (e.g., "warrior with sword", "small slime", "treasure chest")
3. Generate
The tool creates multiple variations that match the style of your reference images.
## Frame Output by Image Size
The number of generated frames depends on the largest style image dimension. Cost can vary non-linearly as the grid adjusts per size:
- **≤32px** → 64 frames (8×8 grid) — 10 generations
- **33-42px** → 64 frames (8×8 grid) — 15 generations
- **43-64px** → 16 frames (4×4 grid) — 10 generations
- **65-85px** → 16 frames (4×4 grid) — 15 generations
- **86-128px** → 4 frames (2×2 grid) — 10 generations
- **129-170px** → 4 frames (2×2 grid) — 15 generations
- **171-256px** → 1 frame — 10 generations
- **257-341px** → 1 frame — 15 generations
- **342-512px** → 1 frame — 25 generations
## Maximum Style Images
The maximum number of style reference images you can add equals the number of frames for that size:
- **32x32**: up to 64 style images
- **64x64**: up to 16 style images
- **128x128**: up to 4 style images
- **256x256**: up to 1 style image
## Options
- **Style Images**: Reference images that define the visual style
- **Description**: What to generate (e.g., "similar characters", "food icons", "potions")
- **Style Description**: Optional text to guide the style (e.g., "pixel art RPG style", "8-bit retro style")
- **No Background**: Generate with transparent background (default: on)
- [Seed](/docs/options/general#seed)
## Tips
- Use multiple style images that share similar aesthetics for more consistent results
- The more style images you provide, the better the model understands your desired style
## Limitations
- Maximum image size is 512x512 pixels
- Requires Tier 1 subscription
- Available in Aseprite and Pixelorama extensions and Creator
---
# Create 8-directional sprite (Pro)
URL: https://www.pixellab.ai/docs/tools/create-8-rotations-pro
The Create 8-directional sprite (Pro) tool generates all 8 rotational views of a character or object in one go. It uses AI to produce south, south-east, east, north-east, north, north-west, west, and south-west views in a single 3×3 grid (8 directions plus center reference). Ideal for top-down or isometric games.
## Methods
- **Create with style** — Describe the character (e.g. "cute wizard", "slime") and optionally provide a reference image. If no reference is given, a default pose is used.
- **Create from concept** — Upload a concept image (e.g. artwork or sketch); the model generates 8 rotations matching that concept.
- **Rotate character** — Provide a single reference image (one direction); the model generates the other 7 directions.
## How It Works
1. Choose method: Create with style, Create from concept, or Rotate character.
2. Depending on method: enter a description, upload a concept image, or upload a reference image.
3. Set **output size** (width × height). Max 168×168 per frame.
4. Optionally set **view** (low top-down, high top-down, side) and **body type** (bipedal, quadrupedal).
5. Generate. You get 8 directional frames in one run.
## Frame Output by Output Size
- 32×32 or 48×48 or 64×64 (or 1–85px) → 8 frames (3×3 grid) — 10 generations
- 86–113px → 8 frames (3×3 grid) — 15 generations
- 114–168px → 8 frames (3×3 grid) — 25 generations
## Options
- **Method**: Create with style / Create from concept / Rotate character
- **Description**: What to generate (create with style)
- **Concept image**: Reference artwork (create from concept), max 1024×1024
- **Reference image**: Single-direction reference (rotate character), max 168×168; optional for create with style (default pose used if omitted)
- **View**: low top-down, high top-down, side
- **Output size**: Width and height per frame; max 168×168
- **Body type**: bipedal, quadrupedal
- **No background**: Transparent background (default: on)
- [Seed](/docs/options/general#seed)
## Limitations
- Output frame size max **168×168** pixels
- Reference image max **168×168**; concept image max **1024×1024**
- Requires **Tier 1** subscription
- Available in Creator and editor extensions
## Related
- [View and direction](/docs/options/character#view-and-direction) — direction order and naming
- [Rotate](/docs/tools/rotate) — non-Pro rotate tool (different pipeline)
- [Rotating a character](/docs/guides/rotating-a-character) — general guide
---
# Create animations (automatic)
URL: https://www.pixellab.ai/docs/tools/create-animations-automatic
The Create animations (automatic) tool generates a character with four rotations and the selected animation in all directions, based on your description and settings. You can optionally use existing images for each direction.
## Options
### Guidance
- [Description](/docs/options/guidance#description)
- [Negative description](/docs/options/guidance#negative-description)
- [Character type](/docs/options/character#character-type)
- [Animation](/docs/options/animation#animation)
- [Direction type](/docs/options/character#direction-type)
- [Scale](/docs/options/character#scale)
- [Camera view](/docs/options/camera#camera-view)
- [Outline](/docs/options/outline) / [Shading](/docs/options/shading) / [Details](/docs/options/details)
- [Guidance weight](/docs/options/guidance#guidance-weight)
### Color
- [Target palette](/docs/options/color#target-palette)
### General
- [Output method](/docs/options/general#output-method)
- [Seed](/docs/options/general#seed)
## Limitations
- The canvas size must be smaller than or equal to 64x64.
- This feature requires at least Tier 1.
---
# Create Character
URL: https://www.pixellab.ai/docs/tools/create-character
See the documentation for [Create Image (Style)](/docs/tools/style).
---
# Create medium-extra large image (pixflux)
URL: https://www.pixellab.ai/docs/tools/create-image-flux
This is the most general model that allows you to generate pixel art images of most things. It is a lot better at text understanding and handles large images very well.
The size of the canvas effects the generation, so it's recommended to have a canvas size that fits what you are creating. When creating scenery roughly a 16:9 ratio (e.g. 160x100) is recommended and
for characters 2:3 ratio (e.g. 48x64).
## Options
### Guidance
- [Description](/docs/options/guidance#description)
- [Negative description](/docs/options/guidance#negative-description)
- [Camera view](/docs/options/guidance#camera-view)
- [Direction](/docs/options/character#view-and-direction)
- [Outline](/docs/options/outline) / [Shading](/docs/options/shading) / [Details](/docs/options/details)
- [Isometric](/docs/options/projection#isometric)
- [Guidance weight](/docs/options/guidance#guidance-weight)
### Color
- [Target Palette](/docs/options/color#target-palette)
### Init image
- [Init image](/docs/options/init-image#init-image)
### General
- [Remove background](/docs/options/general#remove-background)
- [Seed](/docs/options/general#seed)
## Limitations
- The canvas minimum area size is 32x32 and cannot be larger than the area of 200x200 for free tier, 320x320 for tier 1 or 400x400 for tier 2+.
---
# Create Instant Character
URL: https://www.pixellab.ai/docs/tools/create-instant-character
The **Create Instant Character** tool is an experimental feature that generates a character with a four-frame walking animation in all four directions. It is similar to generating a walk animation with the [Create Animations (Automatic)](/docs/tools/animate-automatic) tool, but the generation time is significantly faster.
## Options
### Guidance
- [Description](/docs/options/guidance#description)
- [Camera view](/docs/options/camera#camera-view)
- [Outline](/docs/options/outline) / [Shading](/docs/options/shading) / [Details](/docs/options/details)
- [Guidance weight](/docs/options/guidance#guidance-weight)
### Color
- [Target palette](/docs/options/color#target-palette)
### General
- [Output method](/docs/options/general#output-method)
- [Seed](/docs/options/general#seed)
## Limitations
- The canvas must be exactly 32x32 or 32x40 pixels.
- This feature is experimental and requires at least Tier 2.
---
# Create isometric tile
URL: https://www.pixellab.ai/docs/tools/create-isometric-tile
The **Create Tileset - Isometric Tool** generates isometric tilesets based on your init image or text descriptions.
## Options
### 1. Isometric Tile Shape
This dropdown menu allows you to select the fundamental shape of your isometric tile.
**Options:**
- **Thick**: Creates tiles with a thicker, more substantial appearance
- **Thin**: Produces tiles with a thinner, more delicate look
- **Block**: Generates blocky, cubic-style tiles
- **Reference**: This option utilizes a reference image to define the tile's specific shape, shading, and other visual characteristics. You can use the "Set" and "Clear" buttons to manage your reference image.
- **None**: No specific shape constraint applied
When a shape is selected, the preview area at the top of the dialog updates to reflect the chosen type.
### 2. Description
The Description text field is where you provide a textual prompt for the desired appearance of your tile.
**Purpose:** Tell the model what the tile should look like (e.g., "grass on top of dirt", "rocky path", "wooden floor").
**Detail:** Descriptions can range from simple to highly detailed.
**Creativity:** Feel free to be creative with your descriptions to achieve unique results.
### 3. Outline/Shading/Details
These dropdown menus offer granular control over the visual style of the generated tile. Experiment with different combinations to find the best fit for your project.
- [Outline](/docs/options/outline): Controls the tile's border definition
- [Shading](/docs/options/shading): Determines the lighting and shadow effects
- [Details](/docs/options/details): Influences the level of intricate visual elements
### 4. Tile Size
Select the desired resolution for your isometric tile. The Tile Size does not determine the canvas size, it influences the art style. Choose a size that best fits your canvas or project requirements for optimal detail and readability.
**Options:**
- **32x32**: Recommended for most isometric tilesets, provides optimal detail and readability
- **16x16**: Smaller tiles, good for retro-style games or when space is limited
### 5. Init Image
The [Init Image](/docs/options/init-image) setting plays a crucial role in guiding the generation process by providing an initial visual reference.
**Purpose:** Helps define the **shape and overall appearance** of the generated tile.
**Influence:**
- **Higher value**: The generated tile will more closely resemble the provided initial image.
- **Lower value**: The generated tile will less closely resemble the initial image, allowing the model more creative freedom based on the description.
**Recommendation:** Experiment with different values to find what works best for achieving your desired end result, as the Init Image helps push the model towards your vision.
### 6. Advanced Options
Clicking "Advanced Options" reveals additional settings for fine-tuning the tile generation.
**[Guidance Weight](/docs/options/guidance#guidance-weight)**
- This parameter controls how strongly the model adheres to your text description.
- Higher values will push the model to generate an image that aligns more precisely with your descriptive text.
- It also impacts the outline, shading, details in the generated output.
**Load Previous Settings:**
- This feature allows you to reload previously used [Seed](/docs/options/general#seed) or other generation parameters from a `.json` file. This is useful for reproducing past results or iterating on existing designs.
### Color
- [Target palette](/docs/options/color#target-palette)
### General
- [Output method](/docs/options/general#output-method)
## Tutorial
---
# Create large image
URL: https://www.pixellab.ai/docs/tools/create-large-image
This is the most general model that allows you to quickly generate a pixel art image of most things.
This tool is particularly strong when you give it an initial image in addition to the text prompt to help
guide it to what you’re looking for. It is able to generate the highest resolution images which is very
useful when creating backgrounds. If you want to create a map, then it is recommended that you use the map tools instead.
## Options
### Guidance
- [Description](/docs/options/guidance#description)
- [Negative description](/docs/options/guidance#negative-description)
- [Use view and direction](/docs/options/camera#use-view-and-direction)
- [Guidance weight](/docs/options/guidance#guidance-weight)
### Color
- [Target Palette](/docs/options/color#target-palette)
### Initial image
- [Initial image](/docs/options/init-image#init-image)
### General
- [Remove background](/docs/options/general#remove-background)
- [Seed](/docs/options/general#seed)
## Limitations
- The minimum area size is 100x100 pixels.
- The maximum area size is 200x200 pixels (e.g., 265x150 for 16:9 ratio).
---
# Create map (new)
URL: https://www.pixellab.ai/docs/tools/create-map-new
A newer version of the [Create Map](/docs/tools/map-tiles) tool.
## Options
- [Paint in selection](/docs/options/general#paint-in-selection)
### Guidance
- [Description](/docs/options/guidance#description)
- [Negative description](/docs/options/guidance#negative-description)
- [Map view](/docs/options/camera#map-tiles-view)
- [Details](/docs/options/details)
- [Outline](/docs/options/outline)
- [Shading](/docs/options/shading)
- [Guidance weight](/docs/options/guidance#guidance-weight)
### Color
- [Target Palette](/docs/options/color#target-palette)
### Init image
- [Init image](/docs/options/init-image#init-image)
### General
- [Seed](/docs/options/general#seed)
---
# Create map (pixflux)
URL: https://www.pixellab.ai/docs/tools/create-map
The Create map (Pixflux) tool generates game like pixel art maps in either a top-down or sidecroller view.
## Options
### Guidance
- [Description](/docs/options/guidance#description)
- [Camera view](/docs/options/camera#map-view)
- [Outline](/docs/options/outline) / [Shading](/docs/options/shading) / [Details](/docs/options/details)
- [Guidance weight](/docs/options/guidance#guidance-weight)
### Init image
- [Init image](/docs/options/init-image#init-image)
### Color
- [Target palette](/docs/options/color#target-palette)
### General
- [Output method](/docs/options/general#output-method)
- [Seed](/docs/options/general#seed)
## Limitations
- For the free tier, the canvas cannot be larger than the area of 200x200.
- For tier 1, the canvas cannot be larger than the area of 320x320.
- For tier 2 and above, the canvas cannot be larger than the area of 400x400.
---
# Create S-XL image (Pro)
URL: https://www.pixellab.ai/docs/tools/create-sl-image-pro
The Create S-XL Image tool generates multiple variations of pixel art from a text description. The number of frames generated depends on your canvas size - smaller canvases produce more variations.
## How It Works
1. Choose a canvas size (any dimensions from 16px to 512px per side for square, or larger for non-square aspect ratios)
2. Describe what to generate
3. Optionally add reference images (up to 4) and/or a style image
4. Generate
## Frame Output by Canvas Size
Grid layout is determined by the largest dimension (`max(width, height)`). Cost depends on total grid content size and varies with aspect ratio — values below are for square (1:1) canvases:
- **≤32px** → 64 frames (8×8 grid) — 10 generations
- **33-42px** → 64 frames (8×8 grid) — 15 generations
- **43-64px** → 16 frames (4×4 grid) — 10 generations
- **65-85px** → 16 frames (4×4 grid) — 15 generations
- **86-128px** → 4 frames (2×2 grid) — 10 generations
- **129-170px** → 4 frames (2×2 grid) — 15 generations
- **171-256px** → 1 frame — 10 generations
- **257-341px** → 1 frame — 15 generations
- **342-512px** → 1 frame — 25 generations
## Options
- **Description**: What to generate (e.g., "cute wizard", "medieval knight")
- **No Background**: Generate with transparent background
- **Reference Images** (optional): Up to 4 reference images to guide generation
- **Style Image** (optional): Reference for color palette, outline, detail, and shading
- **Style Options**: Control which aspects to copy from the style image
- [Seed](/docs/options/general#seed)
## Limitations
- Minimum size: 16×16px
- Maximum size depends on aspect ratio (e.g., 512×512 for 1:1 square, up to 688×384 for 16:9)
- Non-square canvases supported — the closest supported aspect ratio is selected automatically
---
# Create texture
URL: https://www.pixellab.ai/docs/tools/create-texture
The Create texture tool generates textures based on your description and is meant to be used in combination with the [Create Tileset](/docs/tools/create-tileset) tool.
## Tutorial
## Options
### Guidance
- [Description](/docs/options/guidance#description)
- [Shading](/docs/options/shading) / [Details](/docs/options/details)
- [Guidance weight](/docs/options/guidance#guidance-weight)
### Init image
- [Init image](/docs/options/init-image#init-image)
### Color
- [Target palette](/docs/options/color#target-palette)
### General
- [Output method](/docs/options/general#output-method)
- [Seed](/docs/options/general#seed)
## Limitations
- This feature requires at least Tier 1.
---
# Create tiles (Pro)
URL: https://www.pixellab.ai/docs/tools/create-tiles-pro
The Create tiles (Pro) tool generates tile variations for game maps from a text description. It supports multiple tile shapes (top-down square, hex, hex pointy, isometric, octagon) and sizes, so you can build terrain transitions and map assets in one go.
## How It Works
1. Enter a **description** of the tiles (e.g. "grass to dirt", "stone wall", "water edge").
2. Choose **tile type**: Square (top-down), Hex, Hex pointy, Isometric, or Octagon.
3. Set **tile size** (and height for non-square tiles if needed).
4. Optionally set **view angle**, **thickness**, or add **style reference tiles** for consistency.
5. Generate. You get a set of tiles ready for use in your map.
## Cost
Cost is **10 or 15 generations** depending on tile type and size. Most small and medium sizes cost 10; larger sizes (e.g. 64×64, 96, 128, or 64×128 depending on shape) cost 15. When style reference tiles are used, cost can vary (typically 10–25).
## Options
- **Description**: What the tiles should look like (e.g. "medieval cobblestone", "grass and sand transition").
- **Tile type**: Square (top-down), Hex, Hex pointy, Isometric, Octagon.
- **Tile size**: 16, 32, 48, 64, 96, 128 (square) or 16×32, 32×64, 48×96, 64×128 (width×height).
- **View angle**: Low top-down (default), high top-down, or side.
- **Tile thickness**: Visual thickness of tiles (where applicable).
- **Style tiles** (optional): Reference images to match style; when used, cost is not fixed to the grid above.
- [Seed](/docs/options/general#seed)
## Limitations
- Requires a paid subscription (tier 1 or above).
## Related
- [Create tileset](/docs/tools/create-tileset) — non-Pro tileset generation
- [Create isometric tile](/docs/tools/create-isometric-tile) — isometric tiles (non-Pro)
- [Creating maps](/docs/guides/map-tiles) — map and tiles guide
---
# Create Tileset
URL: https://www.pixellab.ai/docs/tools/create-tileset
The **Create Tileset Tool** generates a tileset based on your textures or text descriptions. The generated tilesets can be exported to Wang tileset, dual-grid 15-tileset and 3x3 tileset. Wang tileset can be exported and used in [Sprite Fusion](https://www.spritefusion.com/).
## Tileset Types
### Top-Down (High Top-Down)
For top-down games. Describe the inner tile (e.g., "water") and outer tile (e.g., "sand") to create smooth transitions between terrain types.
### Sidescroller
For platformer games. Uses side view with "center tile" and "top tile" descriptions. The top tile describes what appears on top of the center (e.g., center: "dirt", top: "grass").
## Tutorial
## Options
### Guidance
- [Inner description](/docs/options/tileset#inner-description)
- [Outer description](/docs/options/tileset#outer-description)
- [Outline](/docs/options/outline) / [Shading](/docs/options/shading) / [Details](/docs/options/details)
- [Tile size](/docs/options/general#tile-size)
- [Border jitter](/docs/options/tileset#border-jitter)
- [Map strength](/docs/options/tileset#map-strength)
- [Tile strength](/docs/options/tileset#tile-strength)
- [AI border freedom](/docs/options/tileset#ai-border-freedom)
- [Guidance weight](/docs/options/guidance#guidance-weight)
### Color
- [Target palette](/docs/options/color#target-palette)
### General
- [Output method](/docs/options/general#output-method)
- [Seed](/docs/options/general#seed)
## Limitations
- This feature requires at least Tier 1
---
# Create UI elements (Pro)
URL: https://www.pixellab.ai/docs/tools/create-ui-elements-pro
The Create UI Elements tool generates game UI components like health bars, buttons, inventory slots, and menus from text descriptions.
## Tutorial
## Options
- **Description**: What UI elements to generate (e.g., "health bar", "inventory slot", "medieval stone button")
- **No Background**: Generate with transparent background
- **Color Palette** (optional): Color scheme for the UI (e.g., "blue and silver", "brown and gold")
- **Concept Image** (optional): Reference image to guide the style
- [Seed](/docs/options/general#seed)
## Cost
Cost can vary non-linearly as the grid adjusts per size:
- **≤32px**: 8×8 grid — 10 generations
- **33-42px**: 8×8 grid — 15 generations
- **43-64px**: 4×4 grid — 10 generations
- **65-85px**: 4×4 grid — 15 generations
- **86-128px**: 2×2 grid — 10 generations
- **129-170px**: 2×2 grid — 15 generations
- **171-256px**: 1×1 — 10 generations
- **257-341px**: 1×1 — 15 generations
- **342-512px**: 1×1 — 25 generations
## Limitations
- Maximum image size is 512x512 pixels
- Available in Aseprite, Pixelorama, and Simple Creator (/create)
---
# Create UI elements
URL: https://www.pixellab.ai/docs/tools/create-ui-elements
The Create UI Elements tool generates a single pixel art UI component from a text description—e.g. health bars, buttons, inventory slots, icons.
## How It Works
1. Enter a **description** of the UI element (e.g. "health bar", "medieval stone button", "inventory slot").
2. Set **width** and **height** (canvas size).
3. Optionally enable **No background** for a transparent result.
4. Generate. You get one image per run.
## Output and cost
- **1 image per run** — 1 generation.
- Canvas size limits depend on your tier and whether you use inpainting/depth:
- **Minimum:** 16×16 area (e.g. 16×16, 32×8).
- **Free tier:** canvas area ≤ 200×200 (e.g. up to 200×200 or 100×400).
- **Tier 1:** canvas area ≤ 320×320.
- **Tier 2+:** canvas area ≤ 400×400.
- With **inpainting or depth:** smaller limits apply (e.g. 160×160 or 192×192 depending on tier).
## Options
- **Description**: What UI element to generate (e.g. "health bar", "wooden button", "gold coin icon").
- **Width / Height**: Output size in pixels (see limits above).
- **No background**: Transparent background.
- **Init image** (optional): Reference image to guide the result.
- [Seed](/docs/options/general#seed)
## Limitations
- Single image per generation (no grid like the Pro tool).
- Canvas size must be within the limits above.
## Related
- [Create UI elements (Pro)](/docs/tools/create-ui-elements-pro) — grid-based UI generation with more frames and size-based cost.
---
# Edit animation (Pro)
URL: https://www.pixellab.ai/docs/tools/edit-animation-pro
The Edit Animation tool allows you to edit multiple animation frames at once using a text instruction. For example, you can add a sword to all frames of an animation, change an outfit, or modify accessories.
## How It Works
1. Add 2-16 animation frames using the "Add image" button
2. Describe what to add or change (e.g., "add a sword", "give the character a hat")
3. Generate to apply the edit to all frames consistently
## Options
- **Instruction**: Text description of what to add or change
- **No Background**: Generate with transparent background
- [Seed](/docs/options/general#seed)
## Limitations
- Frame limits depend on image size:
- 32-64px: up to 16 frames (4×4 grid) — 10 generations
- 65-80px: up to 9 frames (3×3 grid) — 10 generations
- 81-128px: up to 4 frames (2×2 grid) — 10 generations
- 129-170px: up to 4 frames (2×2 grid) — 15 generations
- 171-256px: up to 4 frames (2×2 grid) — 25 generations
- Minimum 2 frames required
- Available in Aseprite and Pixelorama extensions only
---
# Edit image (Pro)
URL: https://www.pixellab.ai/docs/tools/edit-image-pro
The Edit image (Pro) tool edits a single pixel art image using AI—either from a text instruction or by matching a reference image. Use it to change, add, or remove details (e.g. "give the character a hat") or to transfer the look of a reference onto your image.
## Methods
- **Edit with text** — Describe the edit (e.g. "add a sword", "change shirt to red"). You can optionally add a reference image to guide style.
- **Edit with reference** — Provide a reference image; the tool edits your image to match that reference's appearance.
## How It Works
1. Add the image you want to edit.
2. Choose **Edit with text** or **Edit with reference**.
3. For text: enter a description of the change. For reference: add the reference image.
4. Set output size (same as input or your choice within limits).
5. Generate. You get one edited image per run.
## Frame Output by Output Size
- 1-256px → 1 frame — 10 generations
- 257-314px → 1 frame — 15 generations
- 315-512px → 1 frame — 25 generations
## Options
- **Method**: Edit with text / Edit with reference
- **Description**: What to change (edit with text)
- **Reference image**: Target look (edit with reference), or optional style hint (edit with text)
- **Output size**: Width and height; min 32×32, max 256×256 (tier 1) or larger for tier 2+
- **No background**: Transparent background
- [Seed](/docs/options/general#seed)
## Limitations
- Single image per run (no multi-frame grid).
- Output size at least 32×32; max 256×256 for tier 1 (tier 2+ can allow larger).
- Requires paid subscription (tier 1 or above).
## Related
- [Edit image](/docs/tools/edit-image) — non-Pro edit (inpainting-style)
- [Edit animation (Pro)](/docs/tools/edit-animation-pro) — edit multiple frames at once
- [Transfer outfit (Pro)](/docs/tools/transfer-outfit-pro) — apply outfit from reference to animation frames
---
# Edit image
URL: https://www.pixellab.ai/docs/tools/edit-image
The edit image allows you to edit an image without using inpainting. When using the tool describe an action. Use words like: change, add, remove, or replace, in your instruction. E.g. "give the character a hat"
## Tutorials
### Guidance
- Instruction
- [Guidance weight](/docs/options/guidance#guidance-weight)
### Color
- [Target Palette](/docs/options/color#target-palette)
### General
- [Remove background](/docs/options/general#remove-background)
- [Output method](/docs/options/general#output-method)
- [Seed](/docs/options/general#seed)
## Limitations
- The maximum edit size is an area of 200x200 for tier 1 and 320x320 for tier 1 and 400x400 for tier 2+.
---
# Extend map (v2)
URL: https://www.pixellab.ai/docs/tools/extend-map-v2
An experimental version of the [Extend map tool](/docs/tools/map-tiles).
## Tutorial
## Options
### Guidance
- [Description](/docs/options/guidance#description)
- [Camera view](/docs/options/camera#map-view)
- [Outline](/docs/options/outline) / [Shading](/docs/options/shading) / [Details](/docs/options/details)
- [Isometric](/docs/options/projection#isometric)
- [Tile size](/docs/options/general#tile-size)
- [Guidance weight](/docs/options/guidance#guidance-weight)
### Init image
- [Init image](/docs/options/init-image#init-image)
### Color
- [Target palette](/docs/options/color#target-palette)
### General
- [Output method](/docs/options/general#output-method)
- [Use selection tool to select painting area](/docs/options/general#paint-in-selection)
- [Remove background](/docs/options/general#remove-background)
- [Seed](/docs/options/general#seed)
## Limitations
- The canvas cannot be larger than the area of 180x180.
- This feature is experimental and requires at least Tier 2.
---
# Extend map
URL: https://www.pixellab.ai/docs/tools/extend-map
The Extend Map tool allows you to create maps and tiles. By providing a text prompt for the center of the image and an area that you want to modify, the tool generates a suggestion for the selected area. Very rough init images are extremely useful with this tool.
There is a [written guide here](/docs/guides/map-tiles) and a video tutorial below.
## Tutorial
## Demos
The following videos are short demonstrations of how the tool is used.
This video shows how to use the tool to generate tiles for a side-scroller.
## Options
- [Paint in selection](/docs/options/general#paint-in-selection)
### Guidance
- [Description](/docs/options/guidance#description)
- [Negative description](/docs/options/guidance#negative-description)
- [Camera view](/docs/options/camera#map-tiles-view)
- [Guidance weight](/docs/options/guidance#guidance-weight)
### Color
- [Target Palette](/docs/options/color#target-palette)
### Init image
- [Init image](/docs/options/init-image#init-image)
### General
- [Seed](/docs/options/general#seed)
## Limitations
- For free tier and tier 1, the canvas size must be smaller than or equal to 140x140.
- For tier 2 and above, the canvas size must be smaller than or equal to 200x200.
---
# Image to image (Depth)
URL: https://www.pixellab.ai/docs/tools/image-to-image-depth
The Image to image (Depth) tool allows you to generate new pixel art images using a reference image to guide the shape. This tool is useful for creating consistent variations of an existing image.
## Options
### Guidance
- [Description](/docs/options/guidance#description)
- [Camera view](/docs/options/guidance#camera-view)
- [Direction](/docs/options/character#view-and-direction)
- [Outline](/docs/options/outline) / [Shading](/docs/options/shading) / [Details](/docs/options/details)
- [Isometric](/docs/options/projection#isometric)
- [Oblique projection](/docs/options/projection#oblique-projection)
- [Guidance weight](/docs/options/guidance#guidance-weight)
- [Depth strength](/docs/options/guidance#depth-strength)
### Init image
- [Init image](/docs/options/init-image#init-image)
### Color
- [Target palette](/docs/options/color#target-palette)
### General
- [Output method](/docs/options/general#output-method)
- [Remove background](/docs/options/general#remove-background)
- [Seed](/docs/options/general#seed)
## Limitations
- For the free tier, the canvas cannot be larger than the area of 128x128.
- For tier 1, the canvas cannot be larger than the area of 160x160.
- For tier 2 and above, the canvas cannot be larger than the area of 180x180.
---
# Image to pixel art
URL: https://www.pixellab.ai/docs/tools/image-to-pixel-art
Convert an image to pixel art. We recommend you use the recommended sizes but in general the image is downsized 4 times, if you select a size larger than that the image is automatically resized in the background to your requested image size.
### Guidance
- [Guidance weight](/docs/options/guidance#guidance-weight)
### Color
- [Target Palette](/docs/options/color#target-palette)
### General
- [Remove background](/docs/options/general#remove-background)
- [Output method](/docs/options/general#output-method)
- [Seed](/docs/options/general#seed)
## Limitations
- The maximum output size is an area of 200x200 for tier 1 and 256x256 for tier 1 and 320x320 for tier 2+.
---
# Inpaint medium-large (pixpatch v2)
URL: https://www.pixellab.ai/docs/tools/inpaint-pixpatch-v2
A newer version of the [Inpaint Medium-Large (Pixpatch)](/docs/tools/inpaint-pixpatch) tool.
## Options
### Guidance
- [Description](/docs/options/guidance#description)
- [Camera view](/docs/options/camera#camera-view)
- [Direction](/docs/options/camera#direction)
- [Outline](/docs/options/outline) / [Shading](/docs/options/shading) / [Details](/docs/options/details)
- [Isometric](/docs/options/projection#isometric)
- [Guidance weight](/docs/options/guidance#guidance-weight)
### Init image
- [Init image](/docs/options/init-image#init-image)
### Color
- [Target palette](/docs/options/color#target-palette)
### General
- [Output method](/docs/options/general#output-method)
- [Use selection tool to select painting area](/docs/options/general#paint-in-selection)
- [Remove background](/docs/options/general#remove-background)
- [Seed](/docs/options/general#seed)
## Limitations
- The maximum inpainting size is 180x180.
- This feature is experimental and requires at least Tier 2.
---
# Inpaint (v3)
URL: https://www.pixellab.ai/docs/tools/inpaint-v3
Inpaint v3 is an improved inpainting tool that generates content in masked areas of your image. Draw in the "PixelLab - Inpainting" layer to mark which areas should be modified.
## How It Works
1. Open the Inpaint v3 tool - it creates a "PixelLab - Inpainting" layer
2. Draw on that layer to mark areas you want to change
3. Describe what to generate in those areas (e.g., "grass", "stone floor")
4. Generate
## Options
- **Description**: What to generate in the masked areas
- **No Background**: Generate with transparent background
- **Crop to Mask**: Focus generation on masked area only
- **Use Selection**: For canvases larger than 256x256, use a selection to define the working area
- [Seed](/docs/options/general#seed)
## Limitations
- Minimum size: 32x32 pixels
- Maximum size: 256x256 pixels (use selection for larger canvases)
- Costs 10 generations per use
- Available in Aseprite and Pixelorama extensions only
---
# Inpaint
URL: https://www.pixellab.ai/docs/tools/inpaint
The Inpaint tool allows you to edit specific parts of existing images. For example, you can use it to add a weapon to a character, change a character's outfit, or remove elements from a scene. It is also excellent for creating style-consistent characters, check out this [tutorial](#tutorials).
When you select **Inpaint** from the PixelLab menu, a new layer called **Inpainting** will be added to your image. Drawing on this layer specifies which parts of your image the model is allowed to modify.
## Tutorials
For a written tutorial, see the [getting started guide](/docs/getting-started/).
## Options
- [Paint in selection](/docs/options/general#paint-in-selection)
### Guidance
- [Description](/docs/options/guidance#description)
- [Negative description](/docs/options/guidance#negative-description)
- [Use view and direction](/docs/options/camera#use-view-and-direction)
- [Outline](/docs/options/outline) / [Shading](/docs/options/shading) / [Details](/docs/options/details)
- [Isometric](/docs/options/projection#isometric) / [Oblique projection](/docs/options/projection#oblique-projection)
- [Guidance weight](/docs/options/guidance#guidance-weight)
### Initial image
- [Initial image](/docs/options/init-image#init-image)
### Color
- [Target Palette](/docs/options/color#target-palette)
### General
- [Output method](/docs/options/general#output-method)
- [Seed](/docs/options/general#seed)
## Limitations
- The minimum inpainting size is 32x32 pixels.
- The maximum inpainting size is 100x100 pixels for tier 1 and 160x160 pixels for tier 2+.
---
# Interpolation
URL: https://www.pixellab.ai/docs/tools/interpolation
The Interpolation tool generates intermediate frames between two keyframes in an animation.
## Options
- Intermediate [Guidance weight](/docs/options/guidance#guidance-weight)
- Reference [Guidance weight](/docs/options/guidance#guidance-weight)
### Character
- [Character description](/docs/options/character#character-description)
- [Negative description](/docs/options/character#negative-description)
- [Action description](/docs/options/character#action-description)
- [Camera view](/docs/options/guidance#camera-view)
- [Direction](/docs/options/character#view-and-direction)
- Character options [Guidance weight](/docs/options/guidance#guidance-weight)
### Color
- [Target Palette](/docs/options/color#target-palette)
### General
- [Seed](/docs/options/general#seed)
## Limitations
- The canvas must be exactly 64x64 pixels.
---
# Multi image
URL: https://www.pixellab.ai/docs/tools/multi-image
The Multi image tool is an **experimental** feature that takes **multiple input images** and a text description, then generates or edits output based on them. Use it when you want to combine or transform several references in one go (e.g. several character poses, items, or style refs) with a single prompt.
## How It Works
1. Add **two or more images** (same size; they will be processed together).
2. Enter a **description** of what you want (e.g. "same character in different poses", "apply this style to all").
3. Set **output size** (width and height).
4. Optionally enable **No background** or set a **color palette**.
5. Generate. You get result image(s) based on the inputs and description.
## Cost
- **1 generation** per run (single output).
## Options
- **Images**: Two or more input images (min 16×16 area, max 320×320 area per image; all at the same output size).
- **Description**: What to generate or how to combine/edit the images.
- **Output size**: Width and height for the result.
- **No background**: Transparent background.
- **Color palette** (optional): Reference to guide colors.
- [Seed](/docs/options/general#seed)
## Limitations
- **Experimental** — behavior and availability may change.
- At least two images required; all images must be within 16×16 and 320×320 area.
- Requires **tier 2** or higher.
- May not be available in all clients (e.g. API or Creator only).
## Related
- [Edit image (Pro)](/docs/tools/edit-image-pro) — single-image edit with text or reference
- [Create images from style references (Pro)](/docs/tools/consistent-style) — multiple style refs, one description
---
# Pose to image
URL: https://www.pixellab.ai/docs/tools/pose-to-image
This tool lets you generate a new pixel art image using a pose skeleton for guidance. It is ideal for creating characters in specific stances or actions.
## Options
### Guidance
- [Description](/docs/options/guidance#description)
- [Camera view](/docs/options/guidance#camera-view)
- [Direction](/docs/options/character#view-and-direction)
- [Outline](/docs/options/outline) / [Shading](/docs/options/shading) / [Details](/docs/options/details)
- [Canvas coverage](/docs/options/guidance#canvas-coverage)
- [Pose guidance weight](/docs/options/guidance#pose-guidance-weight)
### Init image
- [Init image](/docs/options/init-image#init-image)
### Color
- [Target palette](/docs/options/color#target-palette)
- [Force colors](/docs/options/color#force-colors)
### General
- [Output method](/docs/options/general#output-method)
## Limitations
- Only supports small and medium image sizes.
- Requires a pose skeleton to be set before generating.
---
# Re-pose
URL: https://www.pixellab.ai/docs/tools/re-pose
The Re-pose tool generates a new pose for your character based on skeleton keypoints. It uses a reference frame with skeleton data to understand your character's structure, then generates the character in a new pose.
## How It Works
1. Create a reference frame with skeleton keypoints (use Estimate Skeleton first)
2. Open the Re-pose tool
3. Adjust the skeleton to your desired pose
4. Generate
## Options
- **View**: high top-down, low top-down, side
- **Direction**: north, east, south, west, south-east, south-west, north-east, north-west
- **Canvas Size**: 256x256, 128x128, 64x64, 32x32, or 16x16 pixels
- [Seed](/docs/options/general#seed)
## Limitations
- Requires a reference frame with skeleton keypoints
- Available in Aseprite extension only
---
# Reduce Colors
URL: https://www.pixellab.ai/docs/tools/reduce-colors
The **Reduce Colors** tool performs what's known as [color quantization](https://en.wikipedia.org/wiki/Color_quantization)—the process of reducing the number of distinct colors in an image. This is often useful because the output of other PixelLab tools can contain many similar or slightly different colors. It can also help when converting an image to match a specific palette.
## Options
- [Quantization method](/docs/options/color#quantization-method)
- [Palette](/docs/options/color#color-reduction-palette)
### Specifying colors
- [Number of colors](/docs/options/color#number-of-colors)
### Dithering
- [Dithering](/docs/options/dithering)
## Limitations
- The maximum image area is 512x512 pixels.
---
# Remove background
URL: https://www.pixellab.ai/docs/tools/remove-background
The Remove Background tool automatically removes backgrounds from pixel art images, leaving only the main subject with transparency.
## Options
- **Removal Mode**:
- **Simple**: For images with solid or simple backgrounds
- **Complex**: For images with detailed backgrounds (requires description)
- **Description** (Complex mode only): Describe the main subject to keep (e.g., "warrior character", "tree")
### General
- [Output method](/docs/options/general#output-method)
## Limitations
- Available in Aseprite and Pixelorama extensions only
---
# Reshape
URL: https://www.pixellab.ai/docs/tools/reshape
The Reshape tool allows you to modify the shape and proportions of a character based on a reference image and a target shape. By analyzing the reference image and adhering to the desired target shape, this tool is often very helpful in animating characters.
## Demo
## Options
- Image [Guidance weight](/docs/options/guidance#guidance-weight)
- Shape [Guidance weight](/docs/options/guidance#guidance-weight)
### Character
- [Character description](/docs/options/character#character-description)
- [Camera view](/docs/options/guidance#camera-view)
- [Guidance weight](/docs/options/guidance#guidance-weight)
### Color
- [Target Palette](/docs/options/color#target-palette)
### Init image
- [Init image](/docs/options/init-image#init-image)
### General
- [Seed](/docs/options/general#seed)
## Limitations
- The canvas must be exactly 64x64 pixels.
---
# Resize
URL: https://www.pixellab.ai/docs/tools/resize
The Resize tool generates your pixel art at a different size using AI. Unlike simple scaling, it intelligently redraws the image to look good at the new resolution.
## How It Works
1. Select or provide a reference image
2. Choose the target output size
3. Optionally add a description to guide the generation
4. Generate
## Options
- **Reference Image**: The image to resize
- **Output Size**: 200x200, 128x128, 64x64, 48x48, or custom size
- **Description** (optional): Guide the generation with text
- [Seed](/docs/options/general#seed)
## Tips
- For large size changes, resize iteratively in steps for best results
- Adding a description helps maintain important details
## Limitations
- Available in Aseprite extension only
---
# Rotate
URL: https://www.pixellab.ai/docs/tools/rotate
The Rotate tool is primarily trained to take an image of a character and generate 8 rotational views, see [view and direction](/docs/options/character#view-and-direction). It can also change the viewpoint between high top-down, low top-down and side-scroller.
The tool is meant to aid the user in creating rotations for characters that can be used when creating animations for different directions.
Accepted canvas sizes are 128x128, 64x64, 32x32, and 16x16. It is recommended to choose the smallest canvas size that still fits the character/object you wish to rotate.
## Improving the results
If you're not satisfied with the output when rotating a character, the following workflow can be used to improve it:
1. Use an existing reference image where the character is looking in the south (frontal/down) direction.
2. Generate a few rotations and pick the easiest to fix.
3. Do very rough manual fixes.
4. Generate new frames using the roughly fixed frames as init images. Use inpainting to freeze the parts that you do not want to be changed.
5. Repeat from step 3 and gradually increase the init image strength as you get closer to what you want.
## Text tutorial
See the guide [Rotating a character](/docs/guides/rotating-a-character) for a step-by-step tutorial.
## Quick Rotate (Only Pixelorama)
To activate the tool, click the tool icon or use the shortcut D:
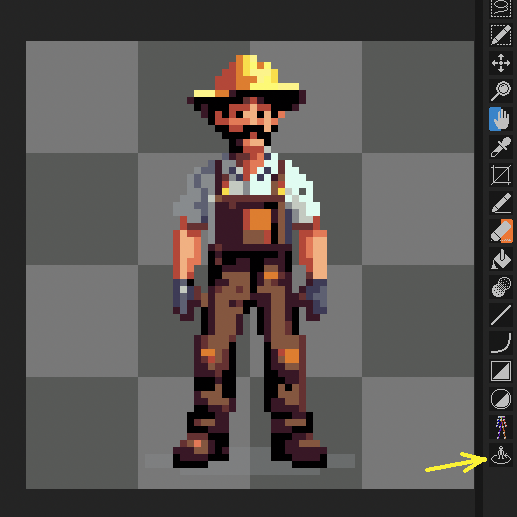
To rotate simply click and hold anywhere on the canvas and drag the mouse left / right to rotate, or up / down to tilt. The rotation angle will snap to 45 degree increments, but you can also rotate freely by holding down Shift.
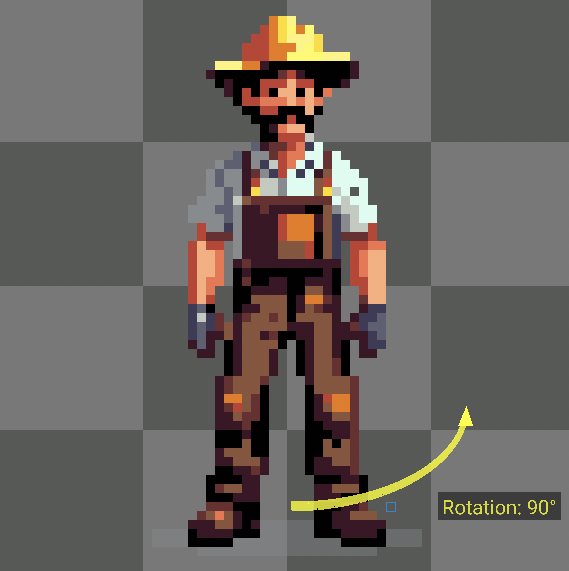
## Video tutorials
## Options
- [Guidance weight](/docs/options/guidance#guidance-weight) of the original image
### Character
- [From view](/docs/options/character#from-view) / [To view](/docs/options/character#to-view) (Aseprite)
- [From direction](/docs/options/character#from-direction) / [To direction](/docs/options/character#to-direction) (Aseprite)
- [Rotation](/docs/options/character#rotation) (Pixelorama)
- [Tilt](/docs/options/character#tilt) (Pixelorama)
- [Oblique projection](/docs/options/projection#oblique-projection)
- [Guidance weight](/docs/options/guidance#guidance-weight)
### Color
- [Target Palette](/docs/options/color#target-palette)
### Init image
- [Init image](/docs/options/init-image#init-image)
### General
- [Seed](/docs/options/general#seed)
## Limitations
- The canvas size must be one of the following:128x128, 64x64, 32x32, or 16x16.
---
# Create small-medium image with style support (bitforge)
URL: https://www.pixellab.ai/docs/tools/style
_"Style-consistent image generation"_
The Create image (style) tool can be used to create a character or item in the same style as a reference image.
There is a detailed guide on how to use the tool in ["Getting started"](/docs/getting-started).
## Options
- [Style guidance weight](/docs/options/guidance#style-guidance-weight)
### Guidance
- [Description](/docs/options/guidance#description)
- [Negative description](/docs/options/guidance#negative-description)
- [Camera view](/docs/options/guidance#camera-view)
- [Direction](/docs/options/character#view-and-direction)
- [Outline](/docs/options/outline) / [Shading](/docs/options/shading) / [Details](/docs/options/details)
- [Isometric](/docs/options/projection#isometric) / [Oblique projection](/docs/options/projection#oblique-projection)
- [Guidance weight](/docs/options/guidance#guidance-weight)
### Color
- [Target Palette](/docs/options/color#target-palette)
### Init image
- [Init image](/docs/options/init-image#init-image)
### General
- [Remove background](/docs/options/general#remove-background)
- [Seed](/docs/options/general#seed)
## Limitations
- The canvas cannot be larger than 80x80 for tier 1 or 140x140 for tier 2+.
---
# Create animated object/character (Pro)
URL: https://www.pixellab.ai/docs/tools/text2animation
The Create Animated Object/Character tool generates a completely new animated sprite from text descriptions. Unlike [Animate with text (pro)](/docs/tools/animate-with-text-pro) which animates an existing reference image, this tool creates both the character and animation from scratch.
## How It Works
1. Set your canvas to one of the supported sizes (32x32, 64x64, or 128x128)
2. Enter a description of what to generate (e.g., "cute wizard", "fire elemental", "bouncing slime")
3. Enter an action description (e.g., "idle", "walk", "attack")
4. Generate
The tool creates a new character matching your description and animates it in a single step.
## Frame Output by Canvas Size
- **32x32** or **64x64** → 16 frames (4×4 grid) — 10 generations
- **65-128px** → 4 frames (2×2 grid) — 10 generations
- **129-170px** → 4 frames (2×2 grid) — 15 generations
- **171-256px** → 4 frames (2×2 grid) — 25 generations
## Options
- **Description**: What to generate (e.g., "cute wizard", "robot", "dragon")
- **Action**: What animation to create (e.g., "walk", "run", "idle", "attack")
- **No Background**: Generate with transparent background
- [Seed](/docs/options/general#seed)
## Limitations
- Maximum canvas size is 256x256 pixels
- Requires Tier 1 subscription
- Available in Pixelorama, Aseprite, and Creator
---
# Transfer outfit (Pro)
URL: https://www.pixellab.ai/docs/tools/transfer-outfit-pro
The Transfer Outfit tool applies an outfit from a reference image to all frames of an animation. Use it to change a character's clothing across an entire animation sequence.
## How It Works
1. Set an outfit image using the "Set outfit" button (the reference)
2. Add 2-15 animation frames using the "Add frame" button
3. Generate to transfer the outfit to all frames
## Options
- **No Background**: Generate with transparent background
- [Seed](/docs/options/general#seed)
## Limitations
- Frame limits depend on image size:
- 32-64px: up to 15 frames (4×4 grid) — 10 generations
- 65-80px: up to 8 frames (3×3 grid) — 10 generations
- 81-128px: up to 3 frames (2×2 grid) — 10 generations
- 129-170px: up to 3 frames (2×2 grid) — 15 generations
- 171-256px: up to 3 frames (2×2 grid) — 25 generations
- Minimum 2 animation frames required
- Available in Aseprite and Pixelorama extensions only
---
# Try on
URL: https://www.pixellab.ai/docs/tools/try-on
The Try on tool is an **experimental** feature that applies a garment or item from one image onto a character or subject in another image. You provide a subject image (e.g. character) and a try-on image (e.g. outfit or item); the tool generates a result with the try-on content applied to the subject.
## How It Works
1. Add a **subject image** (the character or figure to dress).
2. Add a **try-on image** (the garment, outfit, or item to apply).
3. Enter a short **description** of what you want (e.g. "red cloak", "armor").
4. Optionally enable **No background** or set a **color palette**.
5. Generate. You get one image with the try-on applied to the subject.
## Cost
- **1 image per run** — 1 generation.
## Options
- **Subject image**: The character or subject (min 16×16 area, max 320×320 area).
- **Try-on image**: The garment or item to apply (max 320×320 area).
- **Description**: What to apply (e.g. "knight armor", "hooded cloak").
- **No background**: Transparent background.
- **Color palette** (optional): Reference to guide colors.
- [Seed](/docs/options/general#seed)
## Limitations
- **Experimental** — behavior and availability may change.
- Subject and try-on images must be between 16×16 and 320×320 area.
- Requires **tier 2** or higher.
- Single image output per run.
## Related
- [Edit image (Pro)](/docs/tools/edit-image-pro) — edit an image with text or reference
- [Transfer outfit (Pro)](/docs/tools/transfer-outfit-pro) — apply outfit to animation frames
---
# Unzoom pixel art
URL: https://www.pixellab.ai/docs/tools/unzoom-pixelart
The Unzoom Pixel Art tool automatically detects and removes zoom/upscaling from pixel art images. It analyzes the image to find the original pixel size and scales it down accordingly.
## Options
- **Color Reduction**:
- **Auto**: Automatically determine the number of colors
- **None**: Keep all colors as-is
- **Custom**: Specify exact number of colors (2-256)
- **Process All Frames**: Apply unzoom to all animation frames
## Limitations
- Minimum canvas size: 256x256 pixels
- Maximum canvas size: 2048x2048 pixels
- Available in Aseprite and Pixelorama extensions only
---
# Animation options
URL: https://www.pixellab.ai/docs/options/animation
## Action description
A description of the animation that should be generated, e.g., `walk`, `run`, `fire breath`.
## Animation
Relevant to the [Create animations (automatic)](/docs/tools/animate-automatic) tool. This option controls the animation type to be generated. Currently available options are:
- Walk
- Thrust
- Running
- Cast spell
---
# Camera options
URL: https://www.pixellab.ai/docs/options/camera
## Use view and directions
When enabled, tries to control the _view_ and _direction_ of the output.
### View
The view weakly controls the height of the camera. The following options are available:
- _none_: Don't try to guide towards any specific view.
- _low top-down_: Looking down at approximately a 20 degree angle.
- _high top-down_: Looking down at approximately a 35 degree angle.
- _side_: Sidescroller view.
### Direction
The direction weakly controls the direction of the character. The following options are available:
- _none_: Don't try to guide towards any specific direction.
- _north_: Facing away from the camera.
- _east_: Facing right.
- _south_: Facing the camera.
- _west_: Facing left.
### Tips
- The view and direction controls are quite weak in this tool, and you can often get better results if you also use an init image. You can also try adding an extra keyword to the description. For example, when trying to generate a woman with glasses facing right, adding an extra descriptor to your prompt like `woman with glasses in profile` might provide better results.
- In many cases, the _west_ and _east_ cases are redundant since the generated image can be flipped horizontally.
## Map view
For create map, the available options are:
- _high top-down_: The maps are drawn from a bird's-eye view.
- _sidecroller_: The maps are drawn as in a sidescroller game.
---
# Character options
URL: https://www.pixellab.ai/docs/options/character
## Character description
A description guiding the model in what type of character it should generate.
## Negative description
A description of what should **not** be in the generated image. Can sometimes be useful for steering the tool away from generating certain content.
## Action description
A description of the action to interpolate between frames for, e.g., `walk`, `run`, `fire breath`.
## Size of character
Controls how large the generated character will be.
## View and direction
## From view
The view that the rotation reference image is in.
## To view
The view that the generated image should be in.
## From direction
The direction that the rotation reference image is facing.
## To direction
The direction that the generated image should be facing.
## Rotation
The angle by which the character should be rotated.
## Tilt
The angle by which the character should be tilted.
## Character type
Specifies the general style of the character by setting what template that should be used. The options are:
- Bipedal-realistic
- Quadrupedal-tiny
- Bipedal-semi-chibi
## Direction type
Controls which set of directions the animation will be generated for.
- Cardinal directions (north, south, east, and west)
- Ordinal directions (north-east, north-west, south-east, and south-west)
## Scale
Adjusts the size of the generated character as a percentage of the default size.
---
# Color options
URL: https://www.pixellab.ai/docs/options/color
## Limit colors used
Weakly controls the color palette of the generated image. The options are:
- _No_: don't force any particular palette.
- _Color palette_: limit the colors to the current palette.
- _Current image_: limit the colors to the selected image's palette.
## Force colors
Ensures that the generated image adheres to the palette selected in [Target Palette](/docs/options/color#target-palette).
## Quantization method
The options are:
- _Auto_: Automatically selects the numbers of colors to use and then reduces the palette to this size.
- _Specify colors_: Selects a specific number of colors to reduce the palette to.
- _Use palette_: Recuce the colors to a specific palette.
## Color reduction palette
A palette to reduce the colors of the image to. In Pixelorama you will be given the option to import a palette from [Lospec](https://lospec.com/palette-list).
## Number of Colors
The number of colors to reduce the palette to.
---
# Details
URL: https://www.pixellab.ai/docs/options/details
Weakly controls how detailed the generated image should be. The options are:
- Low Detail
- Medium Detail
- High Detail
---
# Dithering options
URL: https://www.pixellab.ai/docs/options/dithering
The color reduction tool has the option to apply dithering to the image.
## Dithering size
The size of the dithering patterns. The options are:
- 2x2
- 4x4
- 8x8
## Dithering strength
Controls how much dithering should be applied to the image.
---
# General options
URL: https://www.pixellab.ai/docs/options/general
## Paint in selection
Limits the model to draw inside the currently selected area.
## Force symmetry
Forces the image to be vertically symmetrical.
### Force symmetry for the rotate tool
For the [rotation tool](/docs/tools/rotate), force symmetry has the following effect:
- Forces the _south_ and _north_ images to be vertically symmetrical.
- Forces the _west_ and _east_ images to be each other's mirror images.
## Remove background
When used, the model will generate images with transparent backgrounds.
### Gray background guidance weight
Some models will let the user guide the gray background generation that is used by the model to remove the background and create transparent images.
## Pixel art style guidance weight
Weakly controls how much the generated image feels like pixel art.
## Seed
The seed of the model's random number generator. Reusing the same seed will, if only small changes to other options are made, provide very similar output. To have a random seed, use the value `0`. This option is only visible when **advanced options** is checked.
## Output method
- _New layer with changes_: The output is added to a new layer.
- _Modify current layer_: The output is added to the currently selected layer. If an initial image is used, it will be modified.
- _New frame_: A new frame is created for the output.
## Tile size
Sets the size of the tiles to be generated or extended, such as 16x16, 32x32.
---
# Guidance options
URL: https://www.pixellab.ai/docs/options/guidance
## Description
A short description of what the tool should generate.
## Negative description
A description of what should **not** be in the generated image. Can sometimes be useful for steering the tool away from generating certain content.
## Guidance weight
Controls how much the model will try to follow the instruction. If it is overdone, then the image can get artifacts like over-saturation.
## Camera view
Weakly controls what perspective the character should be drawn in. The options are:
- _high top-down_: Looking down at approximately a 35 degree angle.
- _low top-down_: Looking down at approximately a 20 degree angle.
- _side_: Sidescroller view.
## Fidelity
Controls how true the model stays to the original image.
## Style guidance weight
Controls how much the model should try to copy the style of the style image.
## Depth strength
Controls how much the model should try to copy the depth of the reference image.
---
# Init image options
URL: https://www.pixellab.ai/docs/options/init-image
## Init image
Instead of starting from scratch, an _init image_ can be provided for the model. This often yields a better result and can be an effective way to guide the model in terms of colors used, perspective, etc.
When this option is used, a small version of the currently selected init image is displayed under the dropdown. To change the init image, select another frame.
### Notes
For some tools, the use of an init image might seem strange. For example, it would be a mistake to conclude that when using the sketch model, the init image option is redundant. It can, on the contrary, be very useful for controlling the colors and shapes of the generated image.
## Init image strength
When using an init image, the slider for _init image strength_ will appear. This controls how much noise is added before the generation starts. Here are some general guidelines.
- **0-300**: Useful for extremely rough color guidance.
- **300-400**: Rough guidance of shapes and colors. Useful if you want to sketch rough color blobs of approximately where you want things to be.
- **400-600**: Medium guidance of shapes and colors. Useful if you want to create variations on an existing image.
- **600-900**: Detailed guidance of shapes and colors. Useful when adding details or slightly modifying a nearly finished piece.
---
# Inpainting
URL: https://www.pixellab.ai/docs/options/inpainting
Inpainting allows you to select which part of an image you want to modify,
and it allows the model to make modifications that match the frozen part of the image.
It can be particularly powerful when combined with init images if you want to, for example,
add a weapon to a character's hand.
### Usage
1. A new layer called "Inpainting" will be created in your image for you.
2. Draw black in the inpainting layer where you want the model to make changes.
3. Create a text prompt describing the full area that the model sees rather than just
the marked area. The model sees the entire image or the selected part if you have checked
the option "use selection".
### Support
Inpainting is supported by multiple tools:
- Inpaint
- Style
- Map
- Rotate
- Animation
---
# Outline
URL: https://www.pixellab.ai/docs/options/outline
Weakly controls the outlines of the generated image. The options are:
- Single-color black outline
- Single-color outline
- Selective outline
- Lineless
---
# Projection
URL: https://www.pixellab.ai/docs/options/projection
## Isometric
Isometric projection is a projection in which the three coordinate axes appear equally foreshortened, and the angle between any two of them is 120 degrees.
Examples of classic games with isometric graphics are SimCity, Final Fantasy Tactics, Age of Empires, and many more.
## Oblique Projection
The graphic style of the game Tibia.
## Tutorials
#### Isometric
#### Oblique
---
# Shading
URL: https://www.pixellab.ai/docs/options/shading
Weakly controls the shading of the generated image, i.e., how many colors will be used. The options are:
- Flat shading
- Basic shading
- Medium shading
- Detailed shading
- Highly detailed shading
---
# Tileset options
URL: https://www.pixellab.ai/docs/options/tileset
*Example of a tileset.*
## Inner description
Description of the "inner" tile. In the above example, the inner tile is the ocean.
## Transition description
Description of the "transition" tile. In the above example, the transition is the cliffs.
## Outer description
Description of the "outer" tile. In the above example, the outer tile is the sand.
## Transition size
Height of the transition tile relative to the [tile size](/docs/options/tilset#tile-size)
## Tile size
Size of the tiles in the tileset. The options are:
- 32x32
- 16x16
## Border jitter
Controls the randomness of the border between tiles.
## Map strength
Controls how much the map influences the tile generation.
## Tile strength
Controls how much the original tile influences the output.
## AI border freedom
Controls how much freedom the AI has to modify the border between tiles.
---