docs
guides
Using the Create Map tool
Using the Create Map tool
In this guide, we'll generate a scene inside a cave, with stairs leading up to a treasure chest. We'll constrain ourselves to a 128x128 pixel image. Since the model is trained on 16x16 pixel tiles, this will give us an area that has a width and height of 8 by 8 tiles.
Setting up the scene
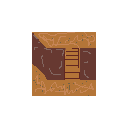
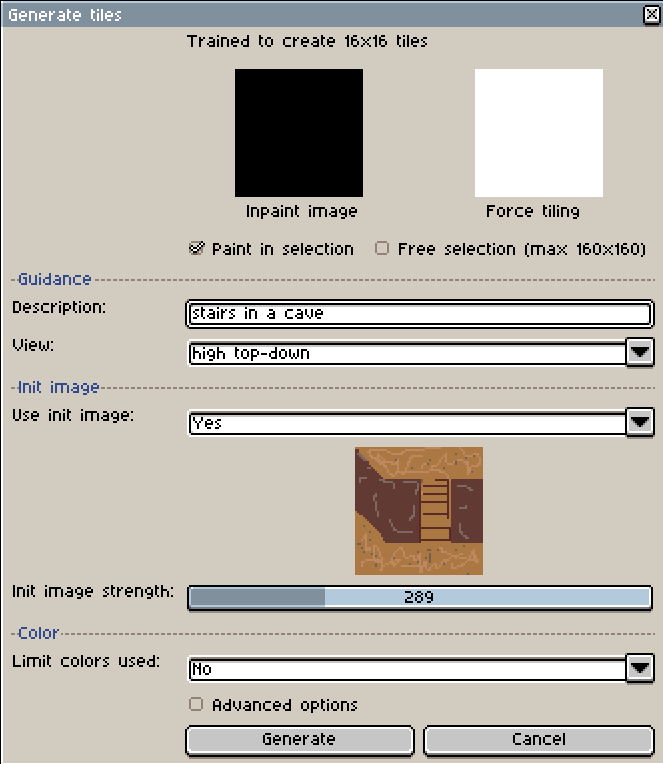
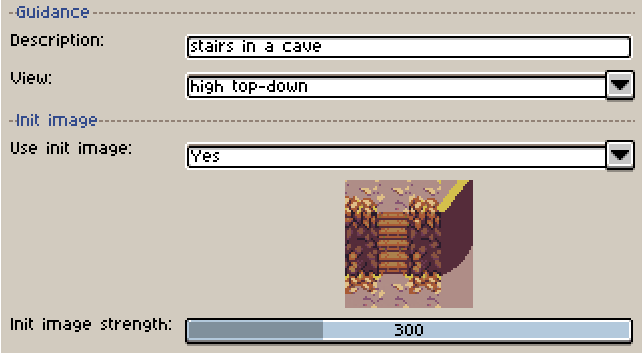
First, let's open the Create Map tool. It's always a good idea to provide an init image together with the text description of what we want our selected area to look like. We'll start with this:
Tell the model what to generate
We'll use the setting paint in selection and select a 4 by 4 area of tiles using the selection tool.
The model uses inpainting. Since this is the first part of the image, we want the model to generate everything inside the selection. To achieve this, we'll fill the inpaint layer with black inside the selection.
Your canvas should now look something like this.


We'll use "stairs in a cave" as the description and press generate.
Note
The 4 by 4 tile selection tells the model what part of the map to generate.
The inpaint layer tells the model where, inside the selection, it can modify the image.
The first generation
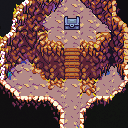
After a few retries, the model produced this result, which seems like a decent starting point.
The first result does not have to be perfect, as many things can be fixed later with inpainting, but it's good to have something that is close to the style we're looking for.
Note
Because of how the model has been trained, to produce the best results, the description should describe what's in the middle of the selected area.
Expanding the image
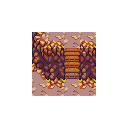
We'll now expand our generated image. Let's start by expanding it to the right.
- Select an area that partly overlaps with what we have already generated.
- Draw a rough sketch inside the selection.
- Draw black in the inpaint layer where we want to generate.


Note
The model can only see what is inside the selection when generating. If we want to have a consistent style and smooth transitions between tiles, it is important that we don't inpaint the whole selection area, as that leaves no reference for the model to use.
Generating the new area
Next, we'll update the description, adjust the init image strength, and then generate the new area. You can see the values used in the picture.
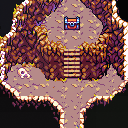
Drawing the rest of the map
We can repeat steps 4 and 5 to fill out the rest of the tiles. Below is an animation of the process.


Final touches
After the entire map has been generated, we can use inpainting to add detail and fix anything we don't like. The workflow is the same as before. For our image, the following changes were made.

The final result