docs
tools
Animate with skeleton
Animate with skeleton
The skeleton animation tool is used for better control over animating your character. You can use inpainting and init images to better control the output of the model. The skeleton you create can be saved as images/aseprite files and reused for your other characters. Just make sure that they are in the "Pose - PixelLab" layer.
Accepted canvas sizes are 256x256, 128x128, 64x64, 32x32, and 16x16. It is recommended to have a canvas size that best fits the character/object you wish to animate.
1. Skeleton setup
We currently have two recommended ways of quickly creating skeletons, "Template skeleton" and "Animation to animation". You can modify these manually or create skeleton animations entirely by hand using edit skeleton.
1.1. Template skeleton
- Start of by selecting the character you want to animate as reference image. This is done by going to the frame where you character is and clicking "Set reference". (Set reference will automatically "estimate skeleton" and give you a skeleton for your character)
- Edit the skeleton (shortcut -> ctrl + space + e) if needed, estimate skeleton isn't perfect and might require some touch ups.
- Change template view and direction so it matches what you want.
- Select the animation template you want to use.
- Use the settings and edits to the reference skeleton to make adjustments so the template skeleton is as similar to your character as possible.
- Once you think it's good enough insert template.
- Go through the frames and edit skeleton where it is required.
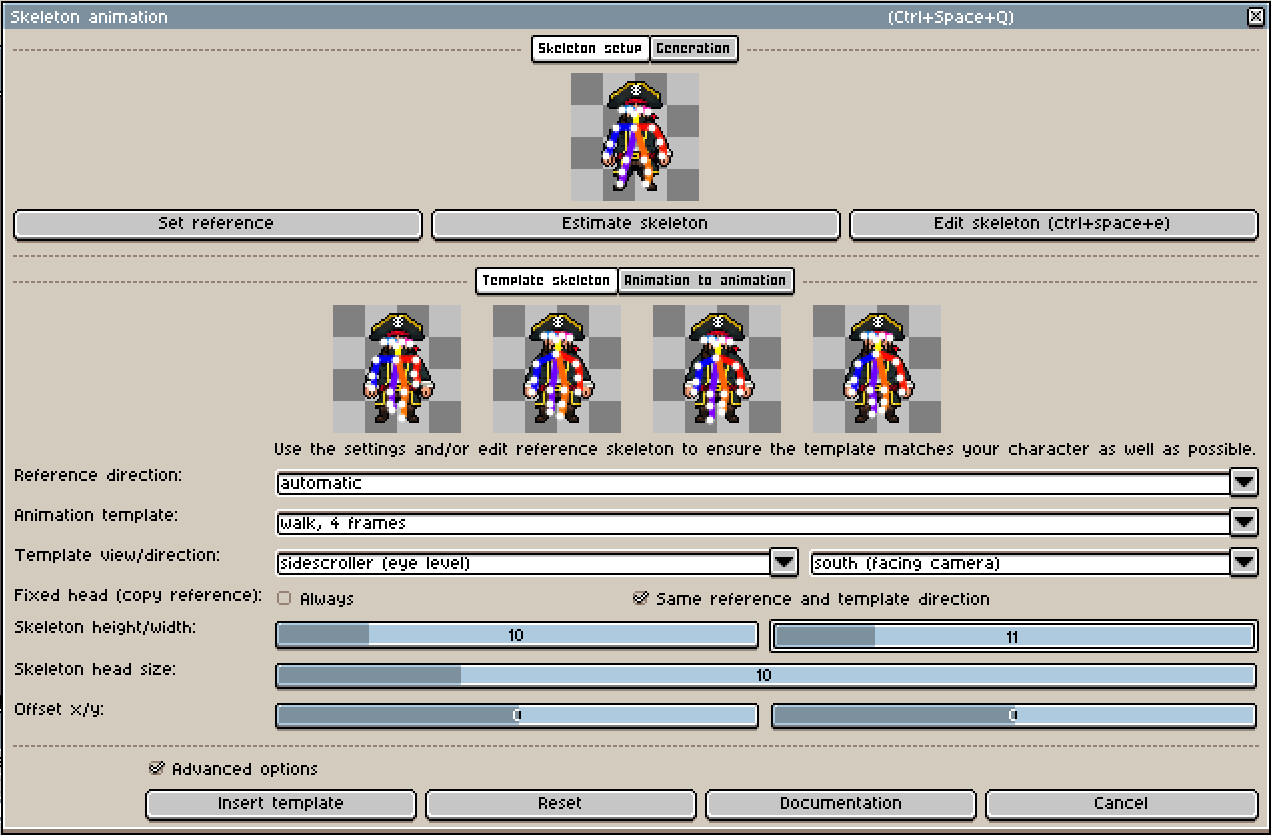
Tip! If it's fine that the characters head doesn't move much in the animation we recommend setting fixed head -> "always" (setting found in advanced options). This will help ensure that your characters face looks the same throughout the animation as it will copy over the head of reference skeleton to the template.
1.2. Animation to animation
- Find an animation you like and place them in the same project as your reference image.
- Set your character you want to animate as reference. This is done by going to the frame where you character is and clicking "Set reference". (Set reference will automatically "estimate skeleton" and give you a skeleton for your character)
- Select the frames that contains the animation and click "Set animation". This will automatically add skeletons to the frames selected. (In the example below we have selected frames 2 -> 5)

- Check the animation skeletons for any issues and fix them using "Edit skeleton".
- Use the settings to change the size / position so it matches your character as best as possible. You can click show reference, to have an easier time comparing the animation to the reference skeleton.
- Once it looks good, click "rescale", check all of the frames and "edit skeleton" if you see any issues.
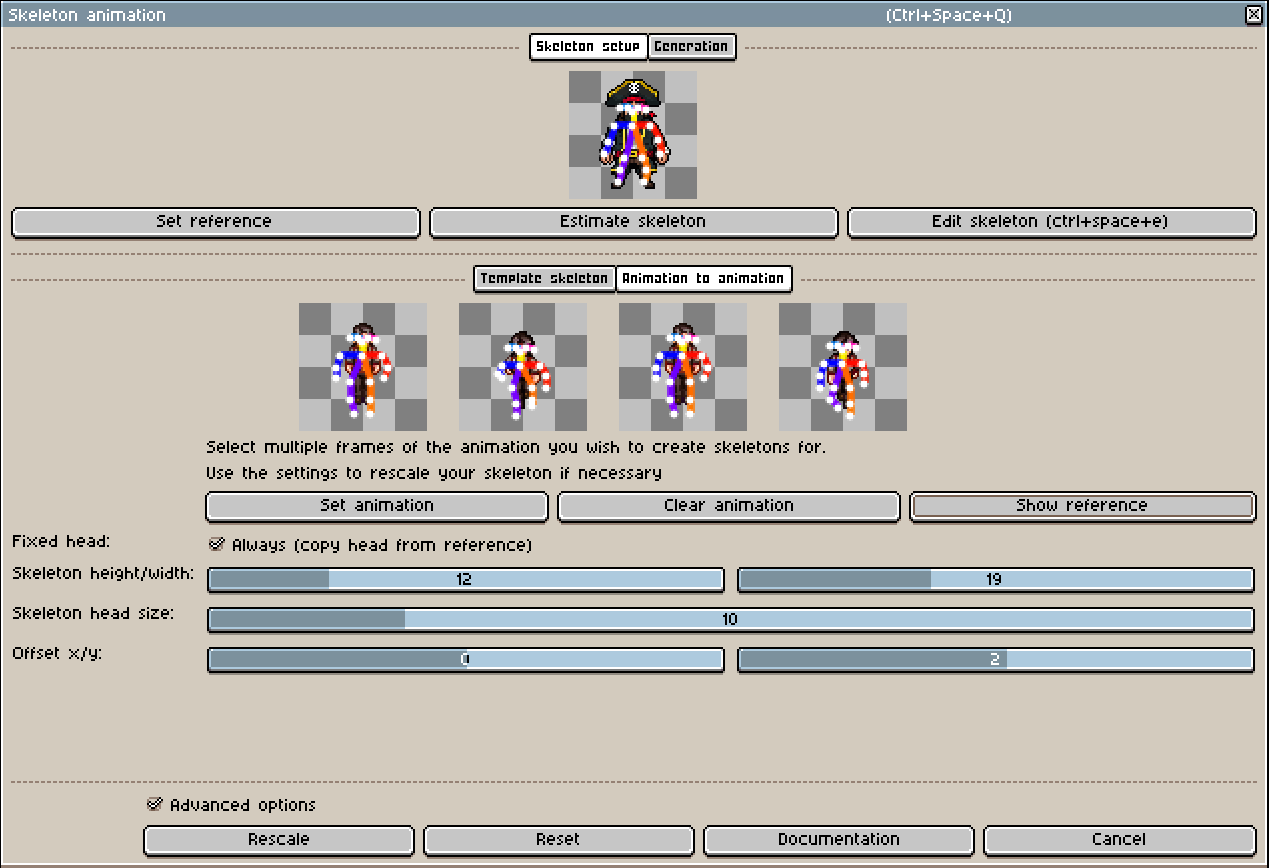
Tip 1! If it's fine that the characters head doesn't move much in the animation we recommend setting fixed head -> "always" (setting found in advanced options). This will help ensure that your characters face looks the same throughout the animation as it will copy over the head of reference skeleton to the template.
Tip 2! Animation to animation can also be used to rescale any skeletons, so if you wish to for example rescale your template skeleton you can do that as well.
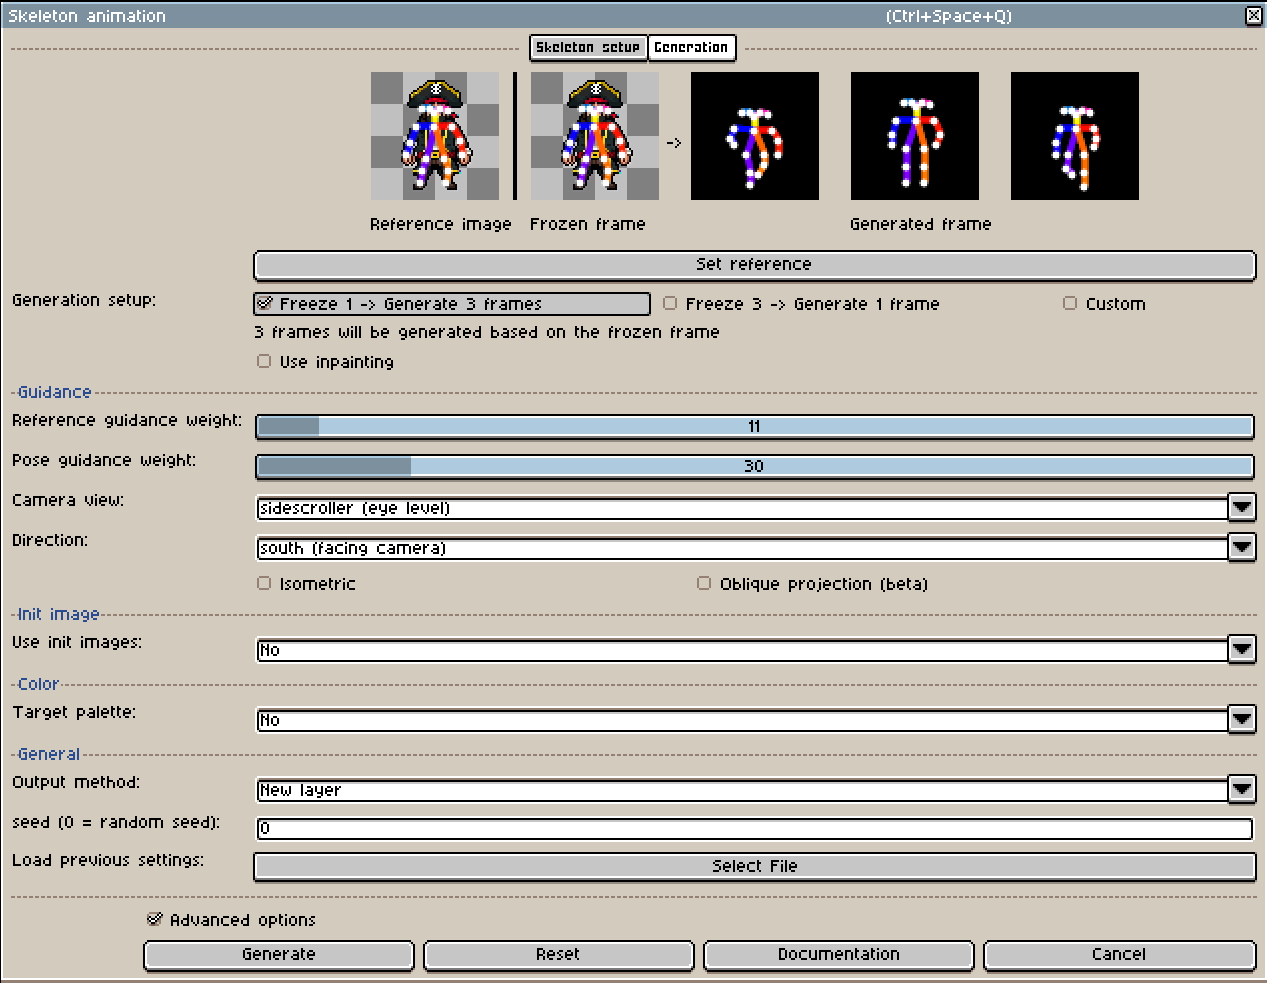
2. Generate
2.1. Freeze 1 -> Generate 2 frames
Once you have the skeletons for the animation it is time to generate!
- For the first generation it is recommended to use "Freeze 1 -> Generate 2 frames".
- Change the direction and view so it matches the animation you are creating.
- Set your character as reference.
- Position yourself on the reference frame so that the model has a good frozen frame. (see image below)
- Click "Generate"
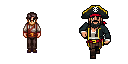
2.1.1. Result from first generation
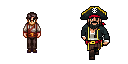
Animation we copied (made by user JosephT) and the result
2.2. Custom
Lets say we now want to fix the arm in the first generated frame. We can use Generation setup "Custom" which allows us to pick which frames we want to be frozen and which we want to edit using inpainting (You can use inpainting in the other settings as well). We decide to use custom because we want to freeze frame 1, 3 and 4 because we like how they look. (See settings below)
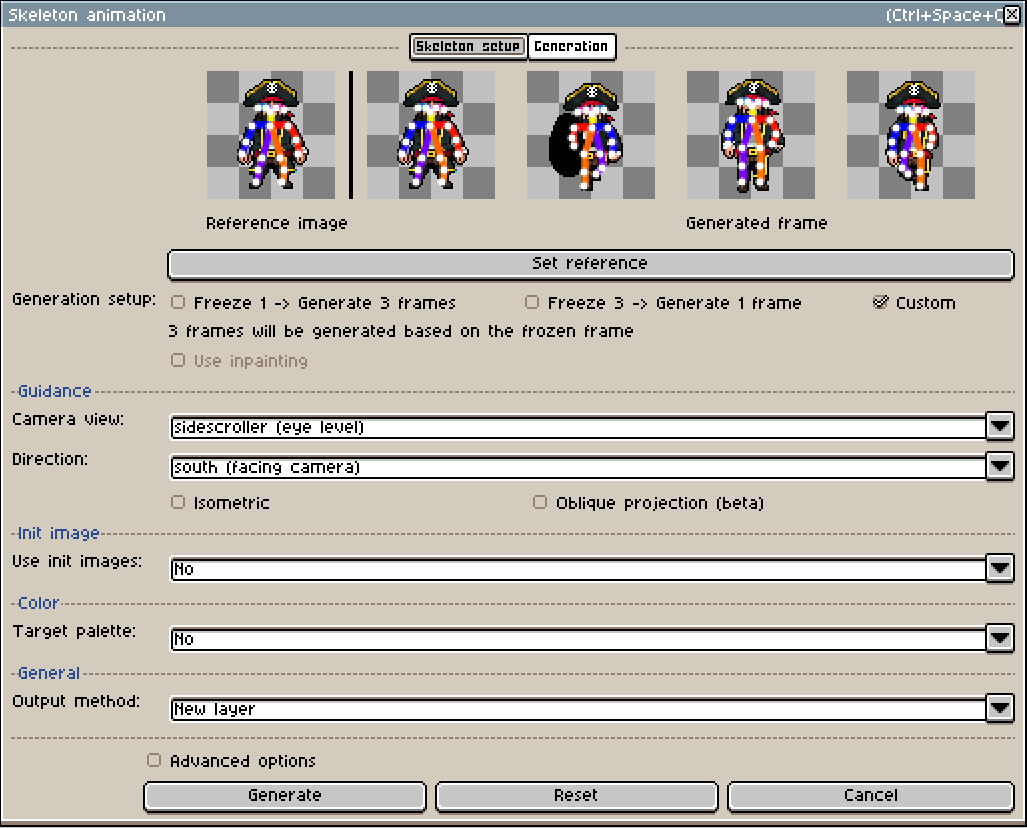
Only the arm of the character in frame two will be edited because it has been inpainted.
2.2.1. Result from second generation
2.3. Freeze 2 -> Generate 1 frame
Works like generation setup "Freeze 1 -> Generate 2 frames" but instead of having one frame for guidance we now have 2. Best to use when you have existing animation frames and you want to add more because the model will produce better results with more information.
In the following example we improvw the last frame using the previous three.
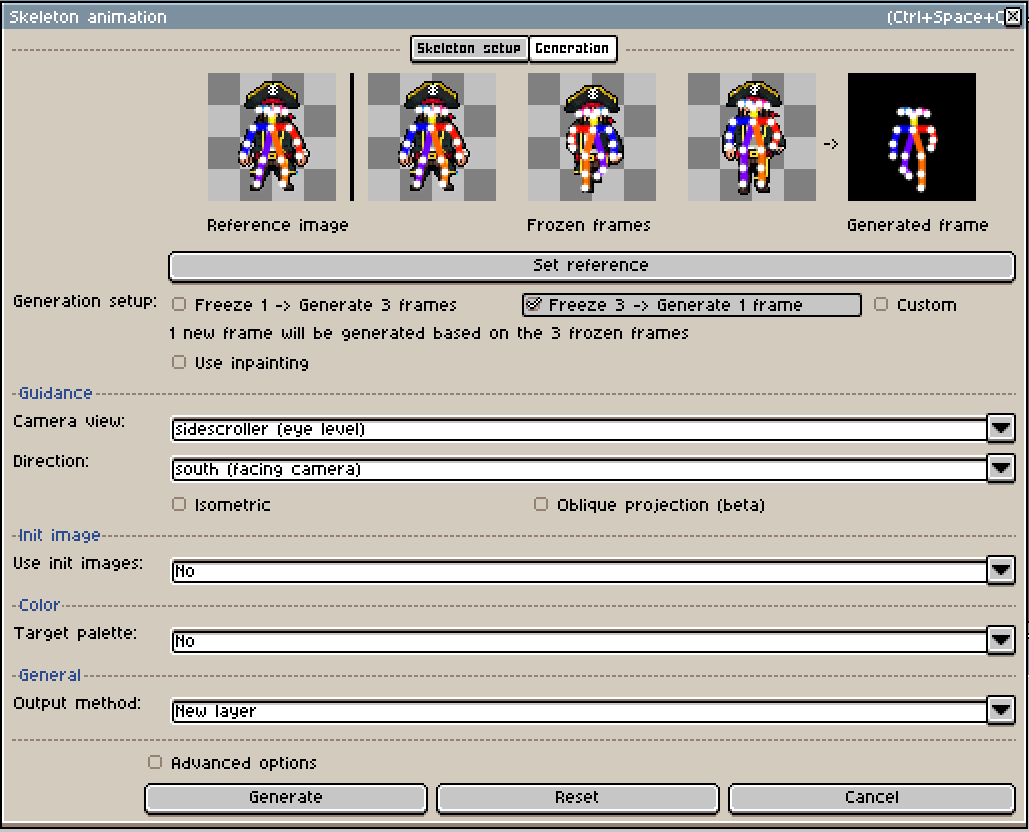
2.3.1. Result from third generation

3. Recommended workflow
- Setup skeleton using previous mentioned methods
- Set your character as a reference image by clicking on "Set reference image".
- Set the view and direction which fits your character.
- Position yourself so you have good frozen frames for the model to use as guidance.
- Generate
- Do very rough manual fixes / edit skeleton.
- Generate new frames using the roughly fixed frames as init images. Use inpainting to decide which parts that you want to be changed.
- Repeat from step 6 and gradually increase the init image strength as you get closer to what you want.
4. Tutorial Videos
5. Options
- Guidance weight of the original image
5.1. Character
5.2. Color
5.3. Init image
5.4. General
6. Limitations
- The canvas size must be one of the following: 256x256, 128x128, 64x64, 32x32, or 16x16.
- This feature requires at least Tier 1.