docs
Init images and inpainting
Init images and inpainting
Welcome to the PixelLab documentation! This guide will help you get started with init images and inpainting using the Create S-M image tool.
The Create S-M image tool
Open Aseprite or Pixelorama and select Create S-M image from the menu by first clicking Create image >.
PixelLab opens automatically when you start Aseprite but if it is closed then you can open it again through the menus:
Edit > PixelLab > Open plugin
or by pressing,
ctrl + space + p.
Configuration
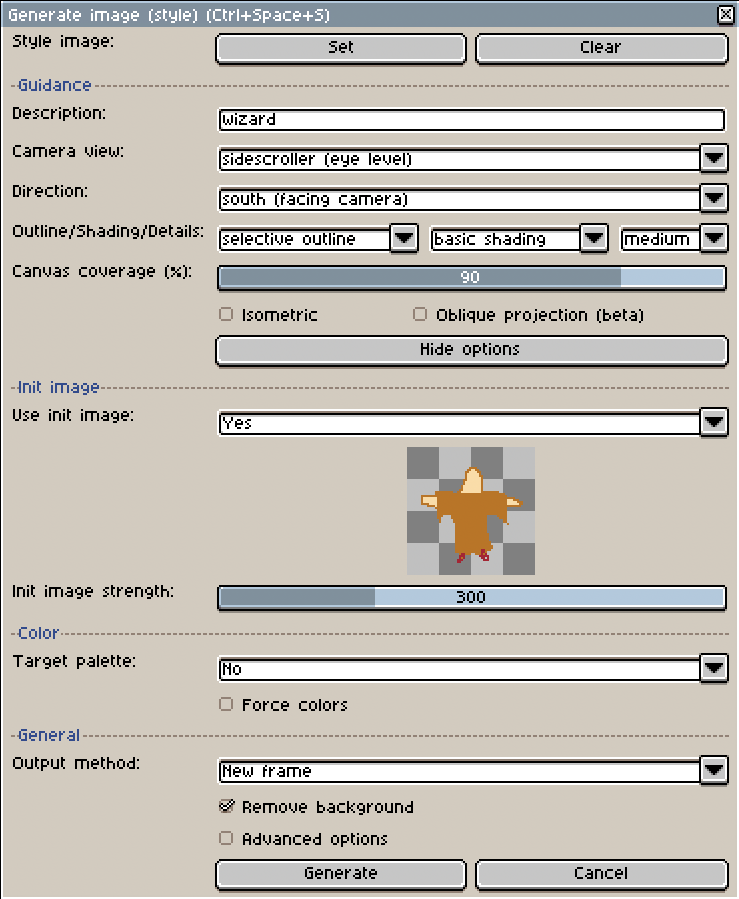
It's usually a good idea to start from an init image. The init image is optional but it is one of the best ways to improve the results you're getting from PixelLab. You can start from a very rough sketch like this:

We'll use the following settings for the generation:
Description: Human mageUse init image: Yes
Everything else was left as the defaults you see in the image. Let's click Generate!
The first result
The model gave the following output. If you're following along you will get another result since the generation is random.

The sprite is pretty good but there are definitely some parts that can be improved, it's not exactly clear what he's holding in his hand and the head looks a bit weird. Let's try to use the inpaint tool to fix these issues.
Inpainting
Click Back and then Cancelto return to the main menu and then, select Inpaint.
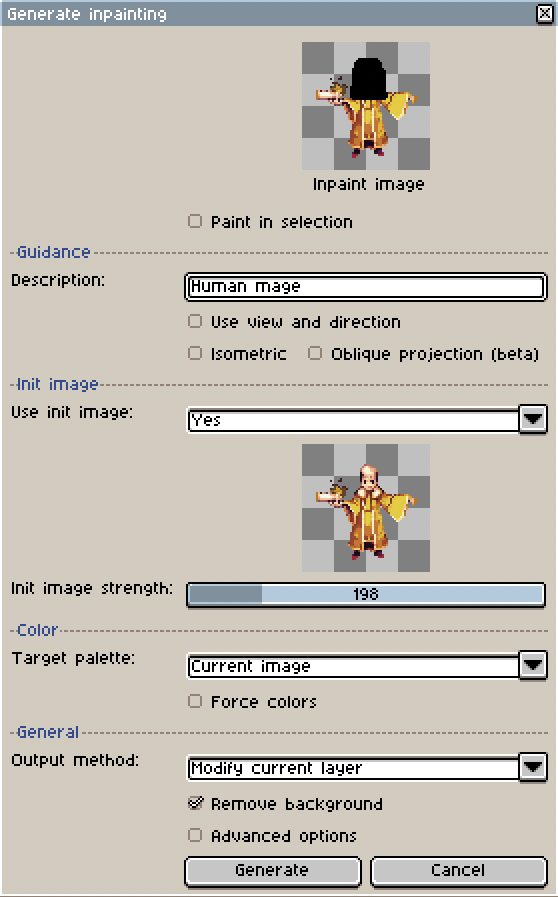
This will create a new layer on top of the generated image that we can use to paint black over the parts that we want to change. The model can only modify the black parts, anything else will be left unchanged.
Let's try to fix the head first, this is how the image looks after painting over the head in the inpainting layer,


Notice in the settings image that we now use our generated image as init image. We'll lower the Init image strength slightly which gives the model more freedom to change the image. We'll set the output method to Modify current layer so that the changes are applied directly to the image. Then we'll click Generate again.
This time, the output looks like this:

Init image and inpainting
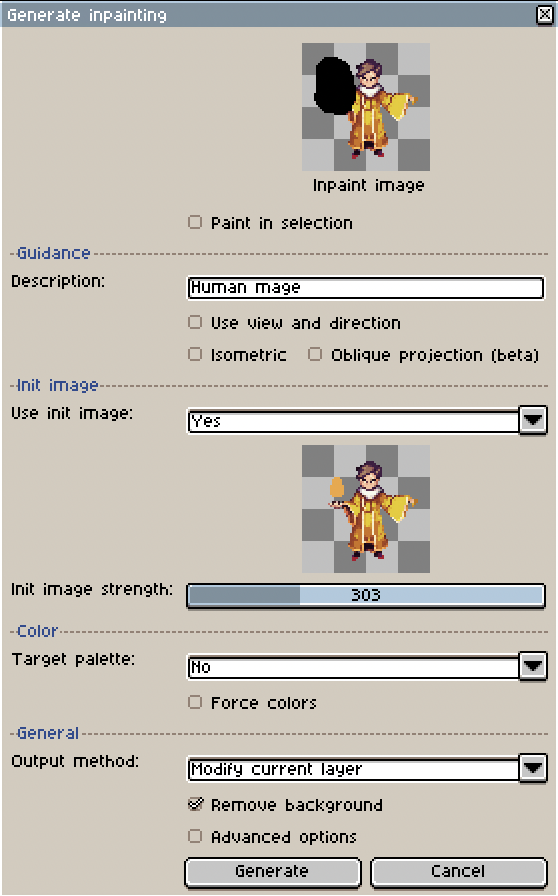
Ok, now that we're satisfied with the head let's try to fix the hand as well. This time let's combine both inpainting and init image.
We'll modify the image slightly and then paint over the area around the hand in the inpainting layer. After drawing a rough sketch of a fireball hovering above the character's hand and then inpainting the area it should look something like this:


The final result
After clicking Generate again we get the following output:

You can continue iterating like this as many times as you want until you are happy with the result.